Metrics are a useful feature to collect numerical or written responses based on a defined schedule of when those data points should be collected.
To create or update a Metric:
Step 1: Click on Metrics tab.
Step 2: Click + New Metric to create a new one or click edit metric if one doesn't already exists)

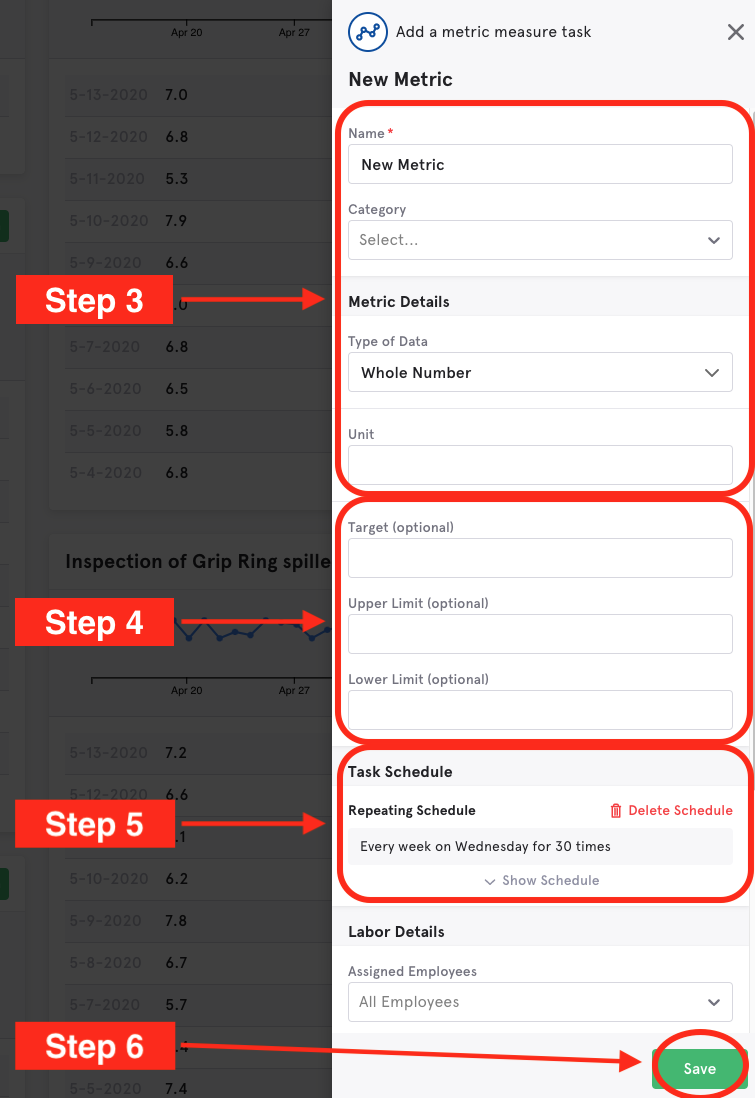
Step 3: Setup a metric with a name, the type of data, the unit of measurement, and the category.
Note: for the Type of Data, you can select Whole Number or Decimal for a numerical response, or Text for a written response.
Step 4: Use the Data Target, Upper Limit, and Lower Limit fields to decide what will trigger an alert (Alerts are setup in the Settings menu).
Step 5: Setup a repeating schedule for the metric's tasks
Step 6: Click Save.

Once created, a user can record a metric one of two ways:
Step 1: From the task list when they check off a Metric task.
- When they check it off, they'll be prompted to enter the metric reading.

Step 2: From the Metrics tab, they can click Enter Data on a specific metric. The same prompt will appear and they can enter their data.

If you're recording numerous metrics at once, don't need a schedule the recording from the task list, and the user will be recording the data in the web browser, consider using Tank Readings.
Next steps: to view metrics in reports, click here.

Comments
0 comments
Article is closed for comments.