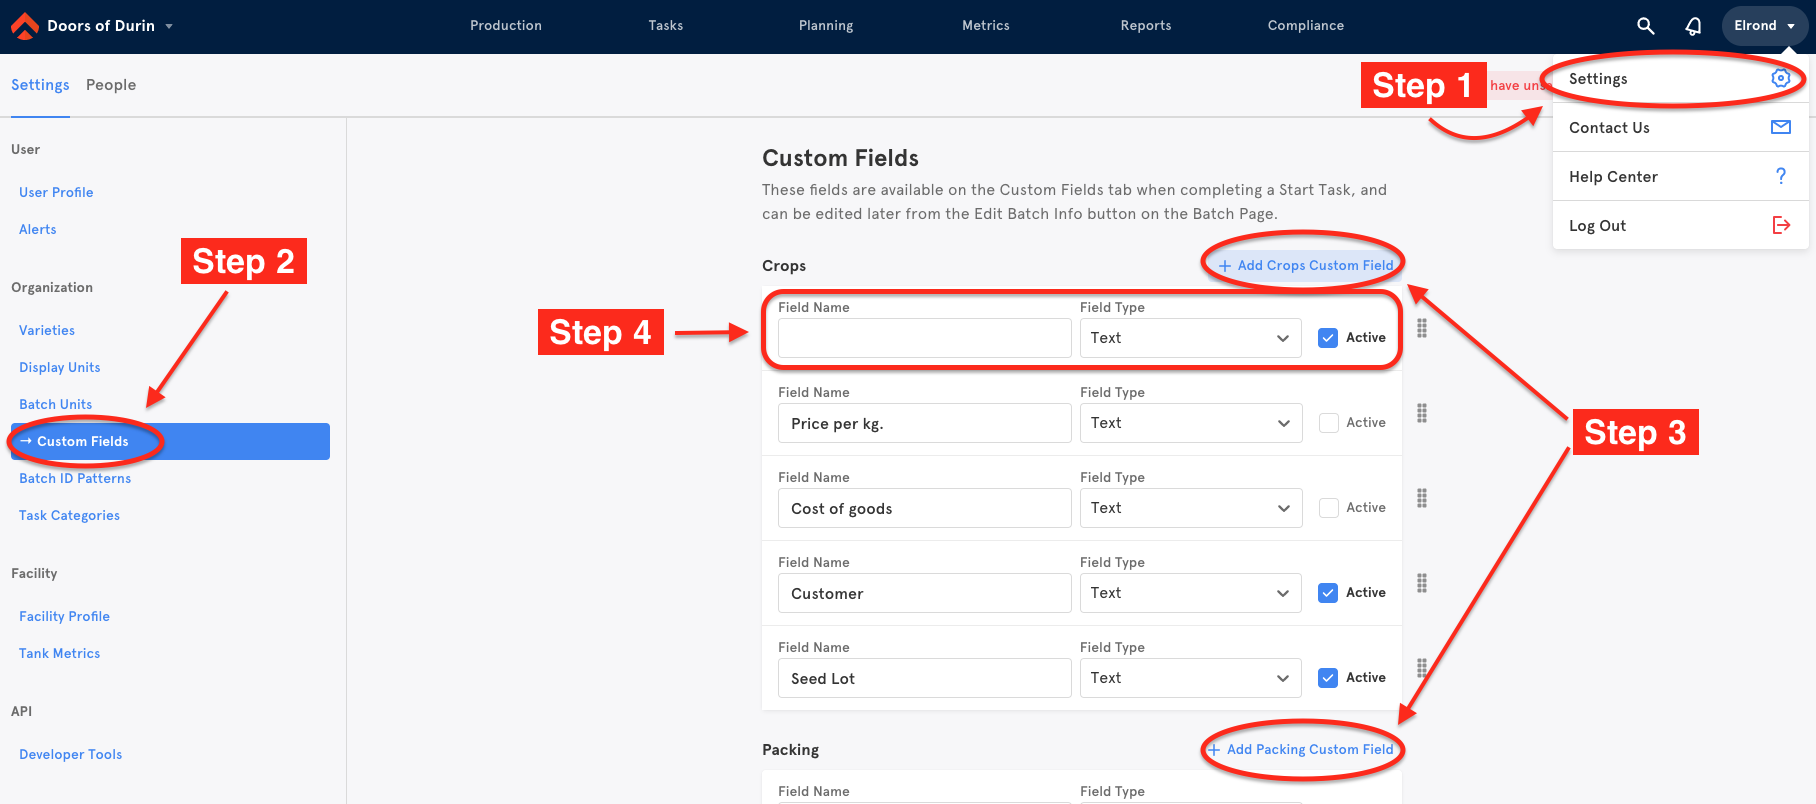
With Custom Fields, a user can add their own metrics to track on each crop batch. After creating Custom Fields, it will show up as an input for crop batch details.
Creating a Custom Field
Step 1: Hover over or click on the username at the far right of the menu bar. Select the Settings option in the dropdown menu.
Step 2: In the list on the left, under Organization click on Custom Fields.
Step 3: Click which field you'd like to customize and click the blue + Add Custom Field (Crops, Packing, Shipping, Materials) to the right.
Step 4: After you click on + Add Custom Field, an empty field will show under the selected section. Fill out the Field Name and select a Field Type.
- Check the Active checkbox next to the new custom field to have the field show up in the batch information section.

Step 5: When finished, click the green Save button on the upper right hand corner.

To view the Custom Field, navigate back to the Crops tab and click on any batch. Click on the crop variety or unique identifier, and select Edit Batch Info.
Comments
0 comments
Please sign in to leave a comment.