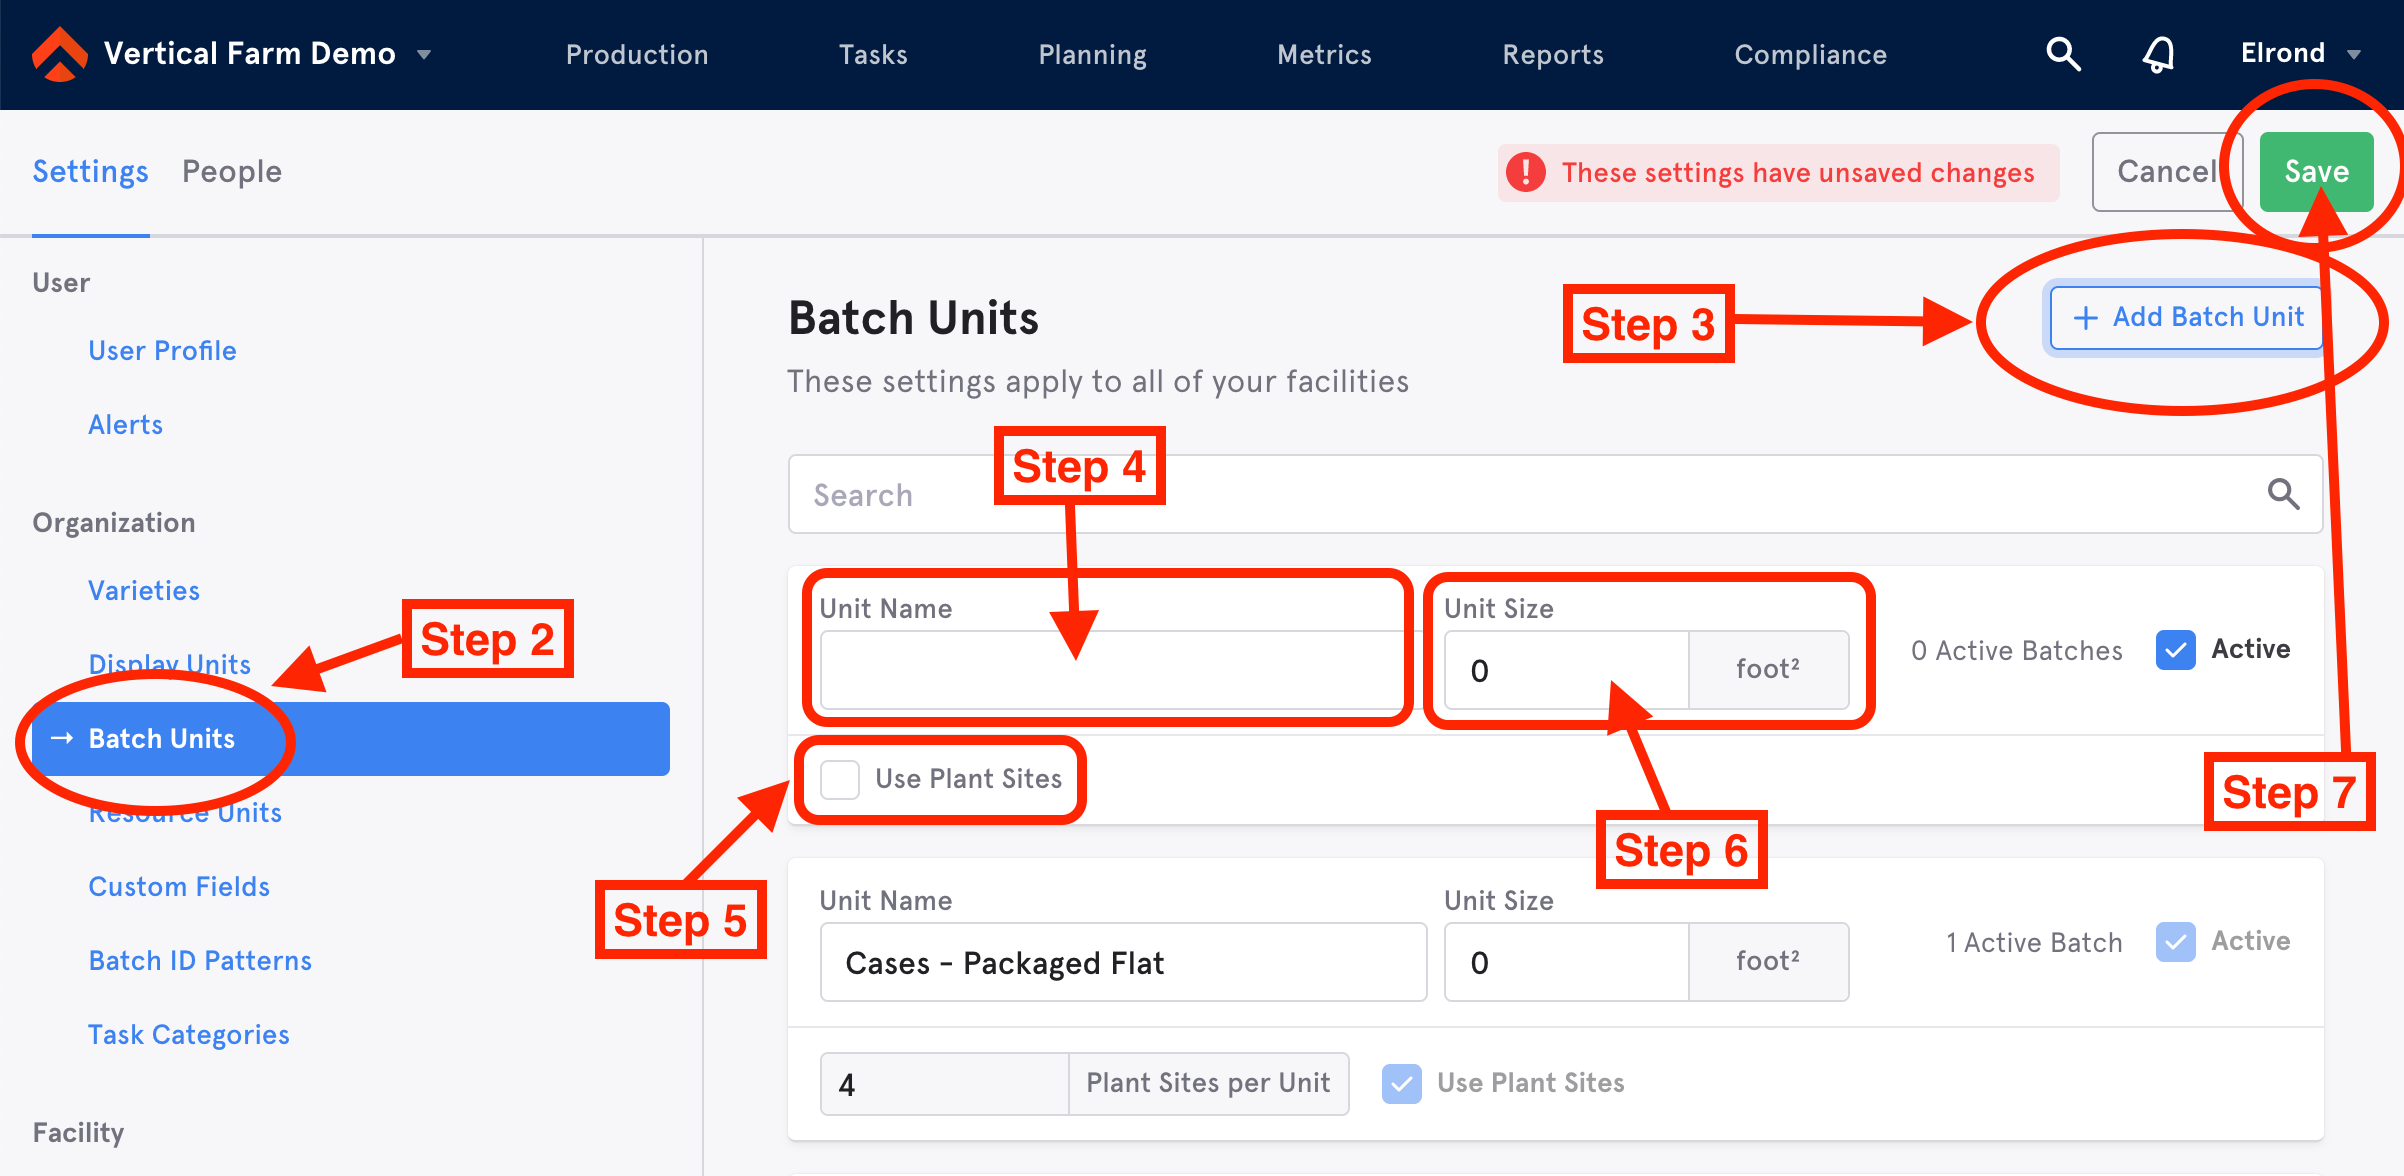
A batch unit is how inventory quantity is determined on each batch. You have the ability to add multiple batch units that reflect how you track the inventory for each product type.
To add batch units:
Step 1: Hover over your username on the upper-right corner of your menu bar and select Settings from the dropdown.

Step 2: Under Organization (make sure you are under the default Settings tab), select Batch Units. You will then be able to edit your units on the right side of your screen. These are the units attached to crop batches within a facility. For example, trays, towers, and rafts are all batch units.
Step 3: To add a new Batch, click on + Add Batch Unit to the right of the Batch Unit.
Step 4: An empty Box will appear above your previously created batches and you will be able to enter the name of the desired new Batch Unit. It will automatically be checked off as Active.
Step 5: To add to your Plant Sites, check the Use Plant Sites for that specific batch.
- To track quantities within a batch more granularly and to reflect how your facility tracks units, add the number of plant sites for that specific batch unit. For example, if there are 104 cells on a sheet of grow media, type 104 under plant site capacity.
Step 6: If you will be calculating your zone capacity by area (as explained here) be sure to enter the Unit Size for any Batch Units that will be used.
Step 7: Click Save on the top right corner to save your new updates.

Note: Once a batch unit is in use (meaning it is currently being used in a zone), you cannot add or make edits to that unit or its plant site capacity unless you remove the unit from active use on under zones sub tab. Alternatively, you can create a new batch unit to set plant capacities for new batches going forward.

Comments
0 comments
Article is closed for comments.