Adding a Schedule
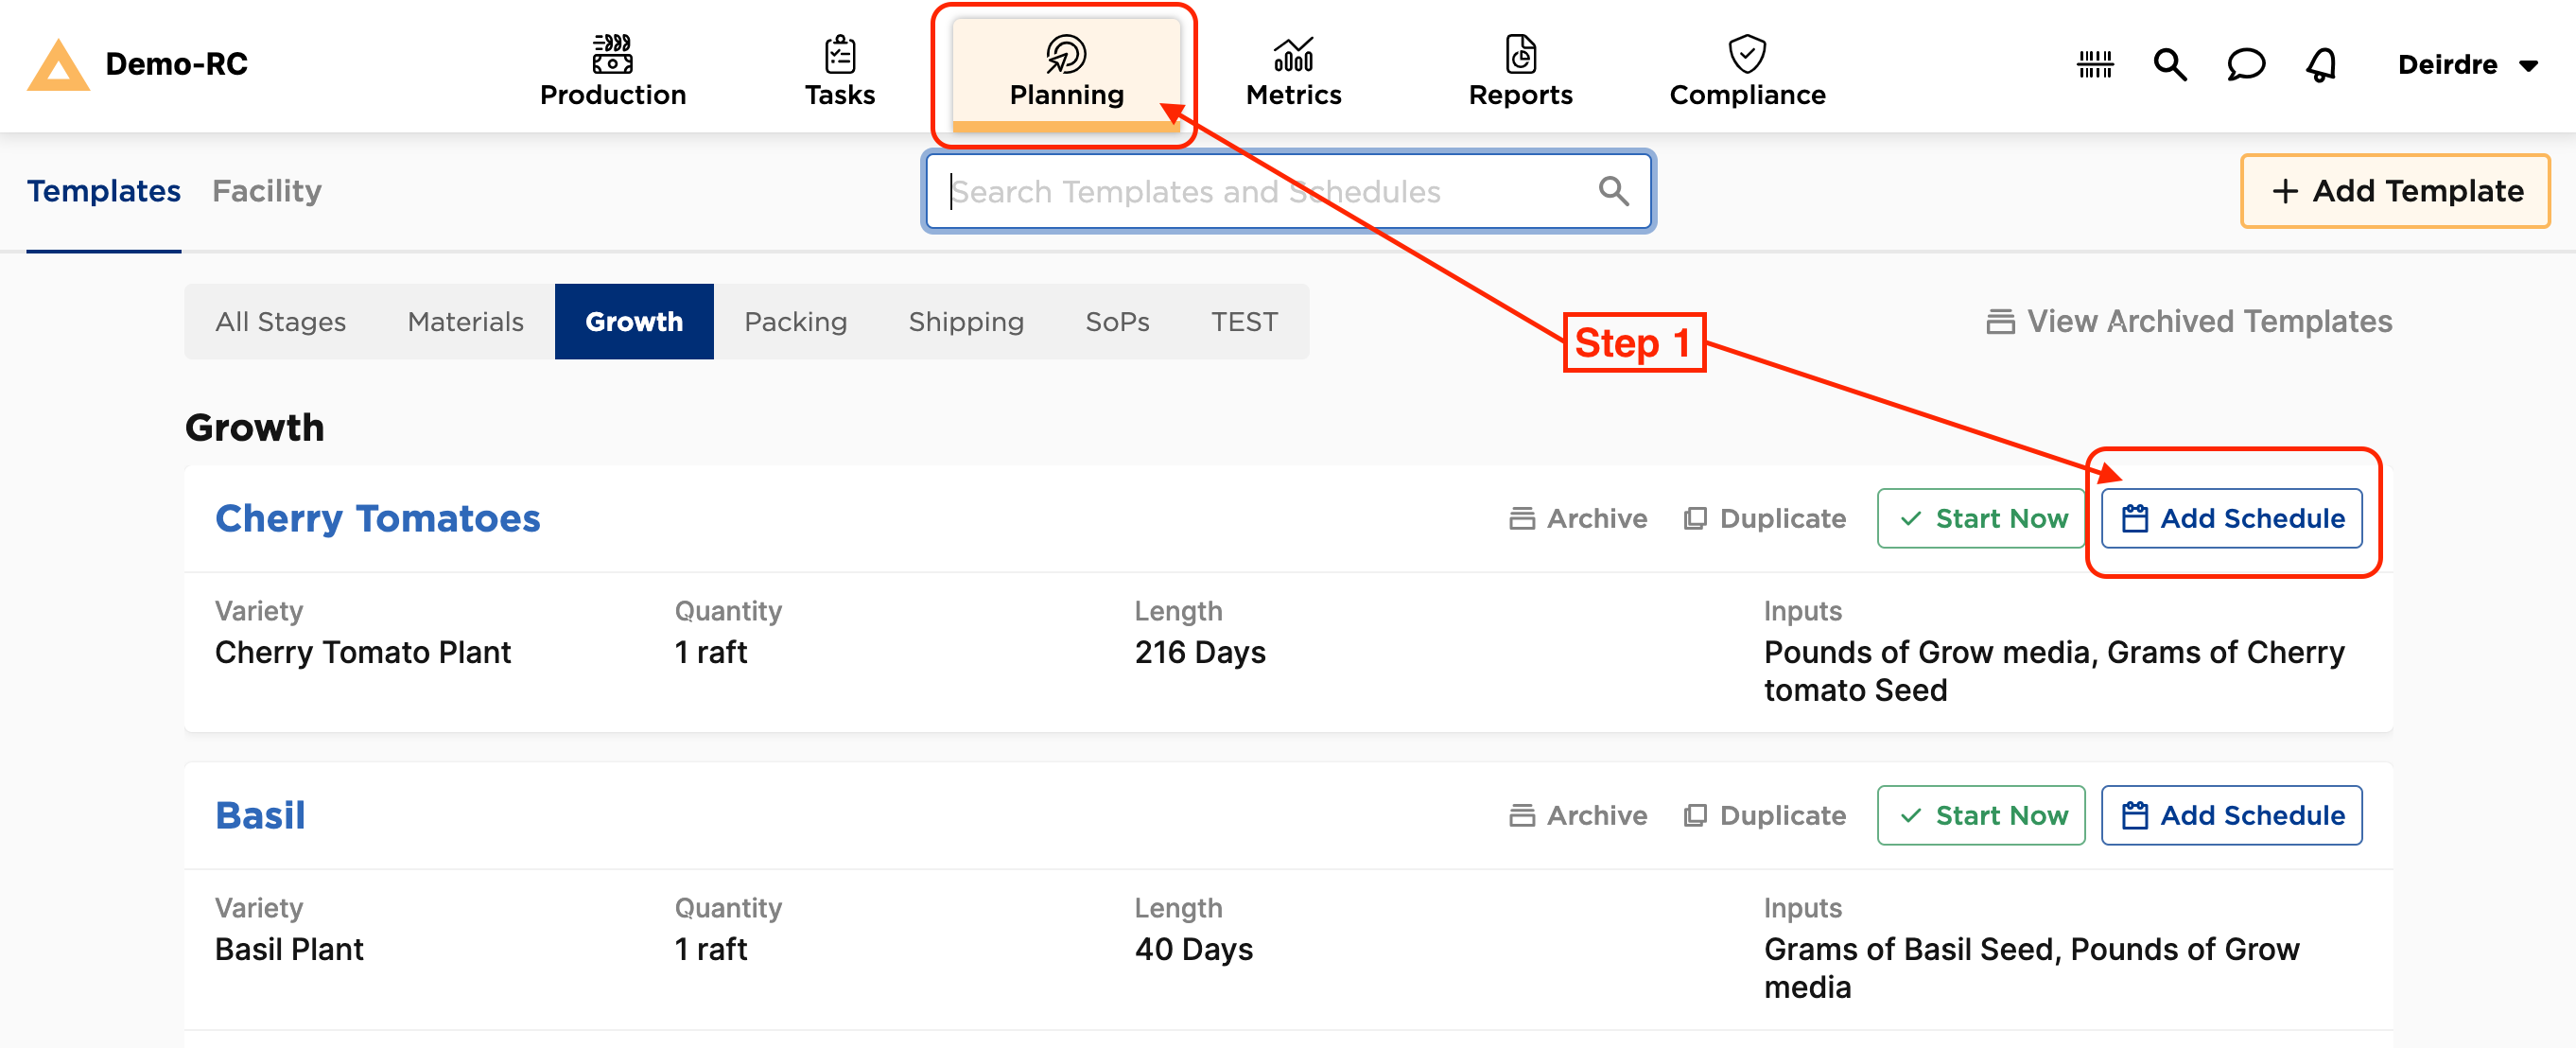
Step 1: Under the Planning tab, click on the blue Add Schedule button on the upper righthand corner of the Template.
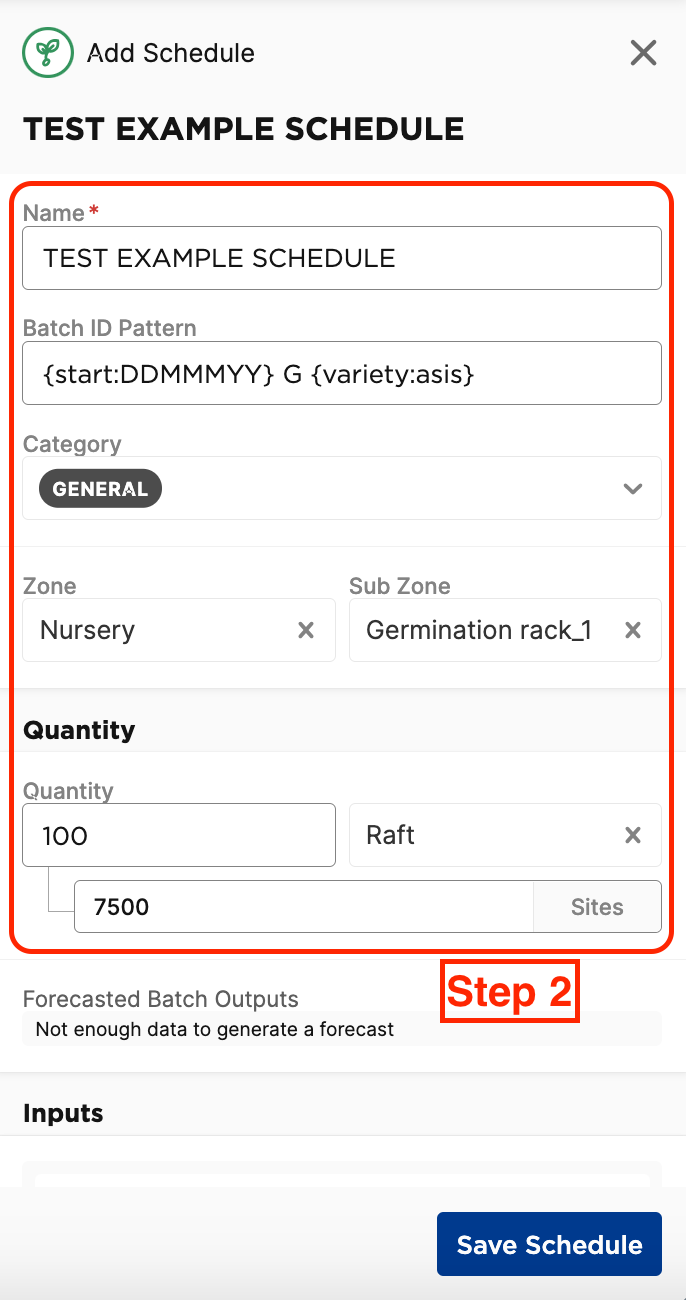
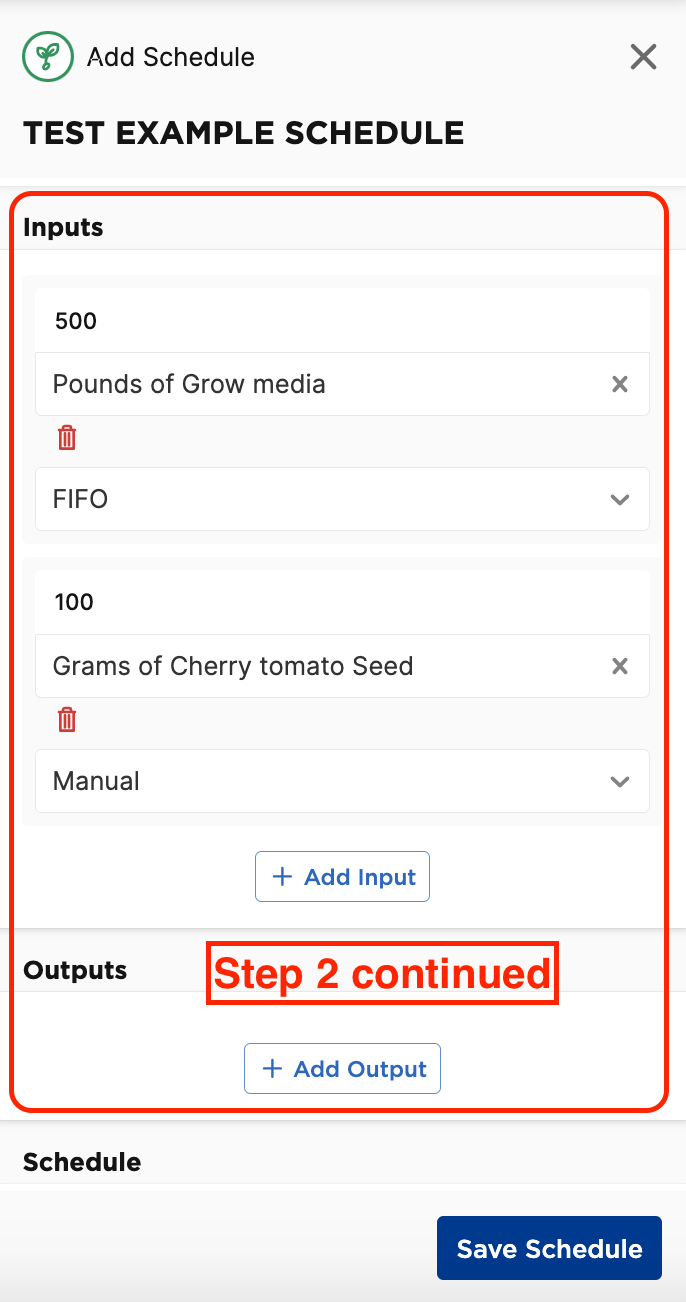
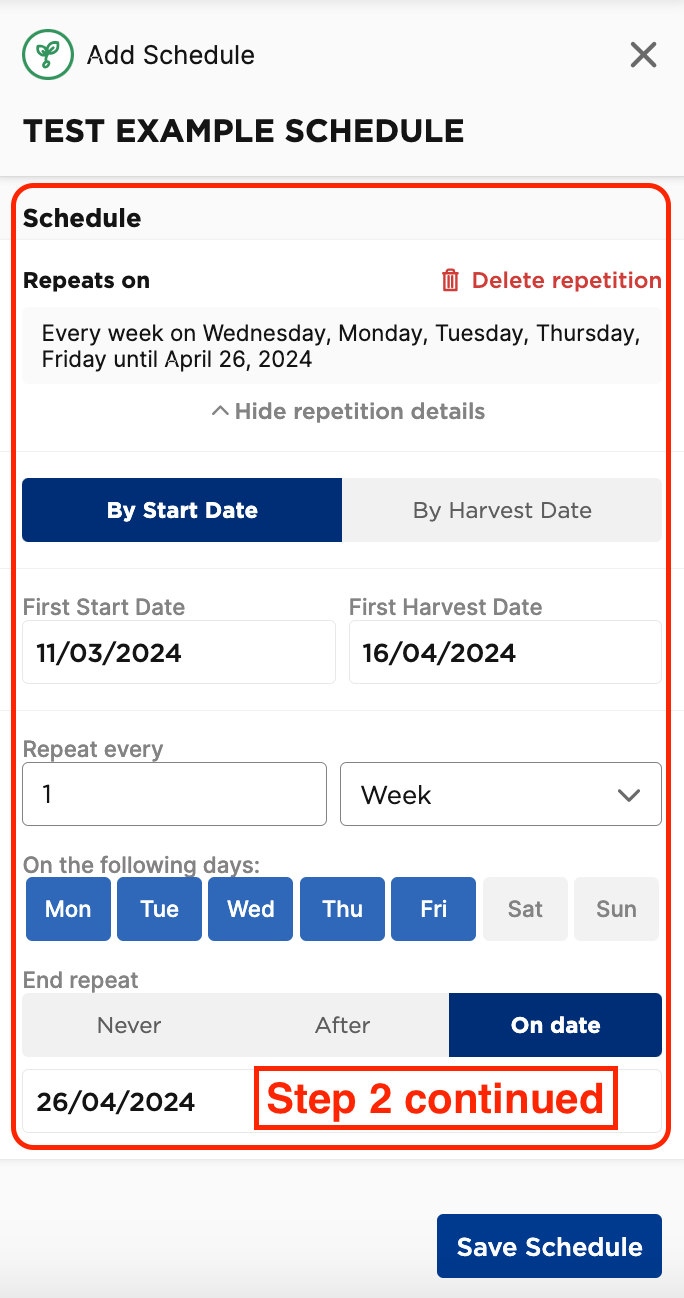
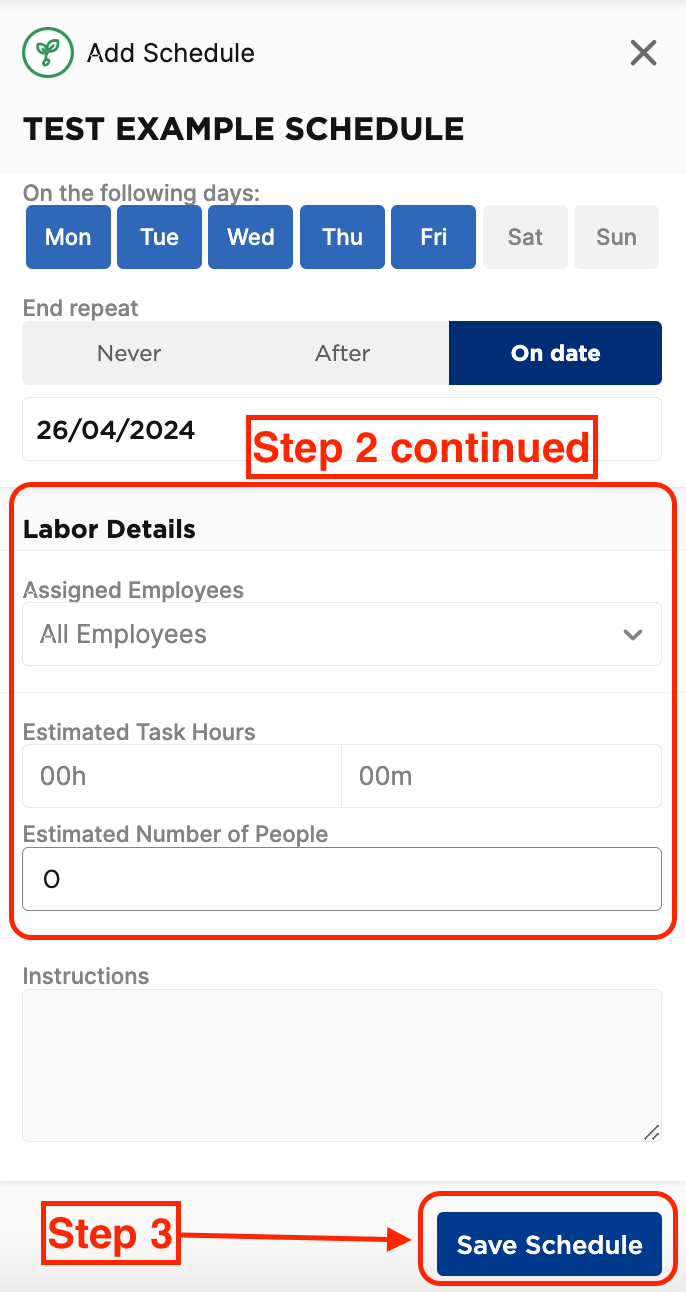
Step 2: A side edit modal will appear. Specify the schedule Name, customized Batch ID Pattern (if any), Task Category, starting Zone/Subzone, starting Quantity, Inputs to be consumed, Outputs to be generated, and any Schedule details (start date, repetition frequency, end date). If you'd like to schedule a single batch start, click on the red "Delete repetition" option at the top of the Schedule section and select the due date. Custom Fields can be filled out at the Schedule level, which will automatically apply to all batches started from the schedule. You can also assign the scheduled batch start tasks or set the estimated labor hours here if desired. Note that the schedule fields will pull in any information defined on the template's start task by default, but these can be overridden on the Schedule EXCEPT the Instructions – which must be set on the template's start task.
Step 3: Click the blue Save Schedule button when finished. Start tasks will automatically be added to your task list.
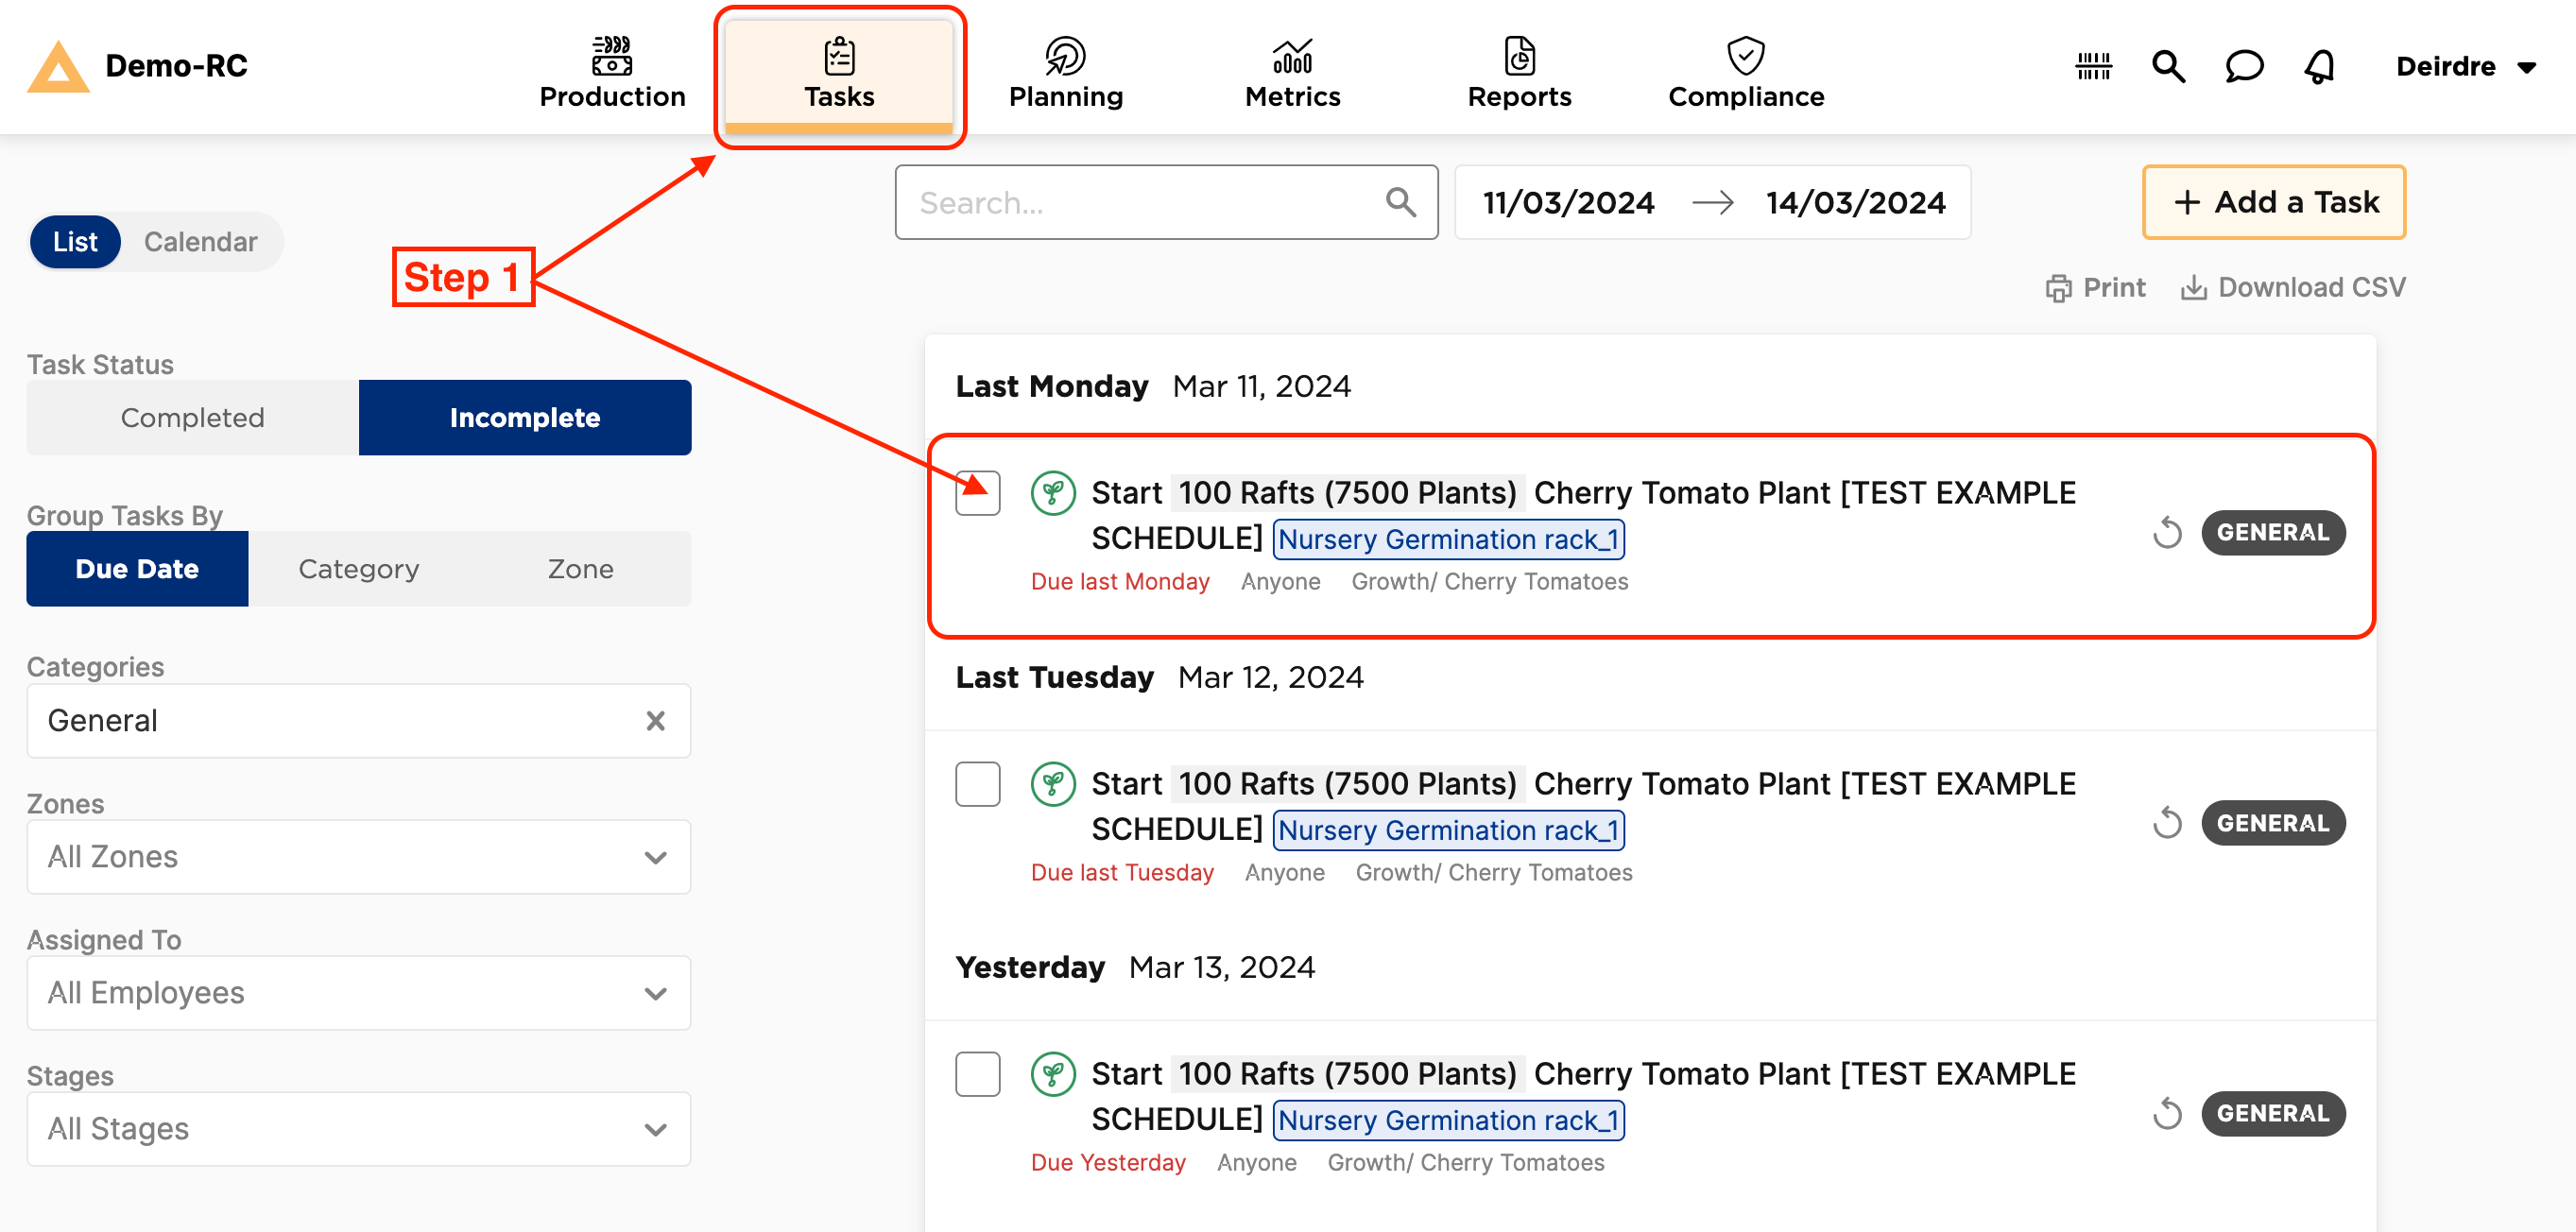
Starting a Batch from a Scheduled in the Task tab (aka single batch, planned start)
- Once a schedule is added, a task will be created in the task list.
Step 1: On the Task tab, check off the Start task to begin creating the batch
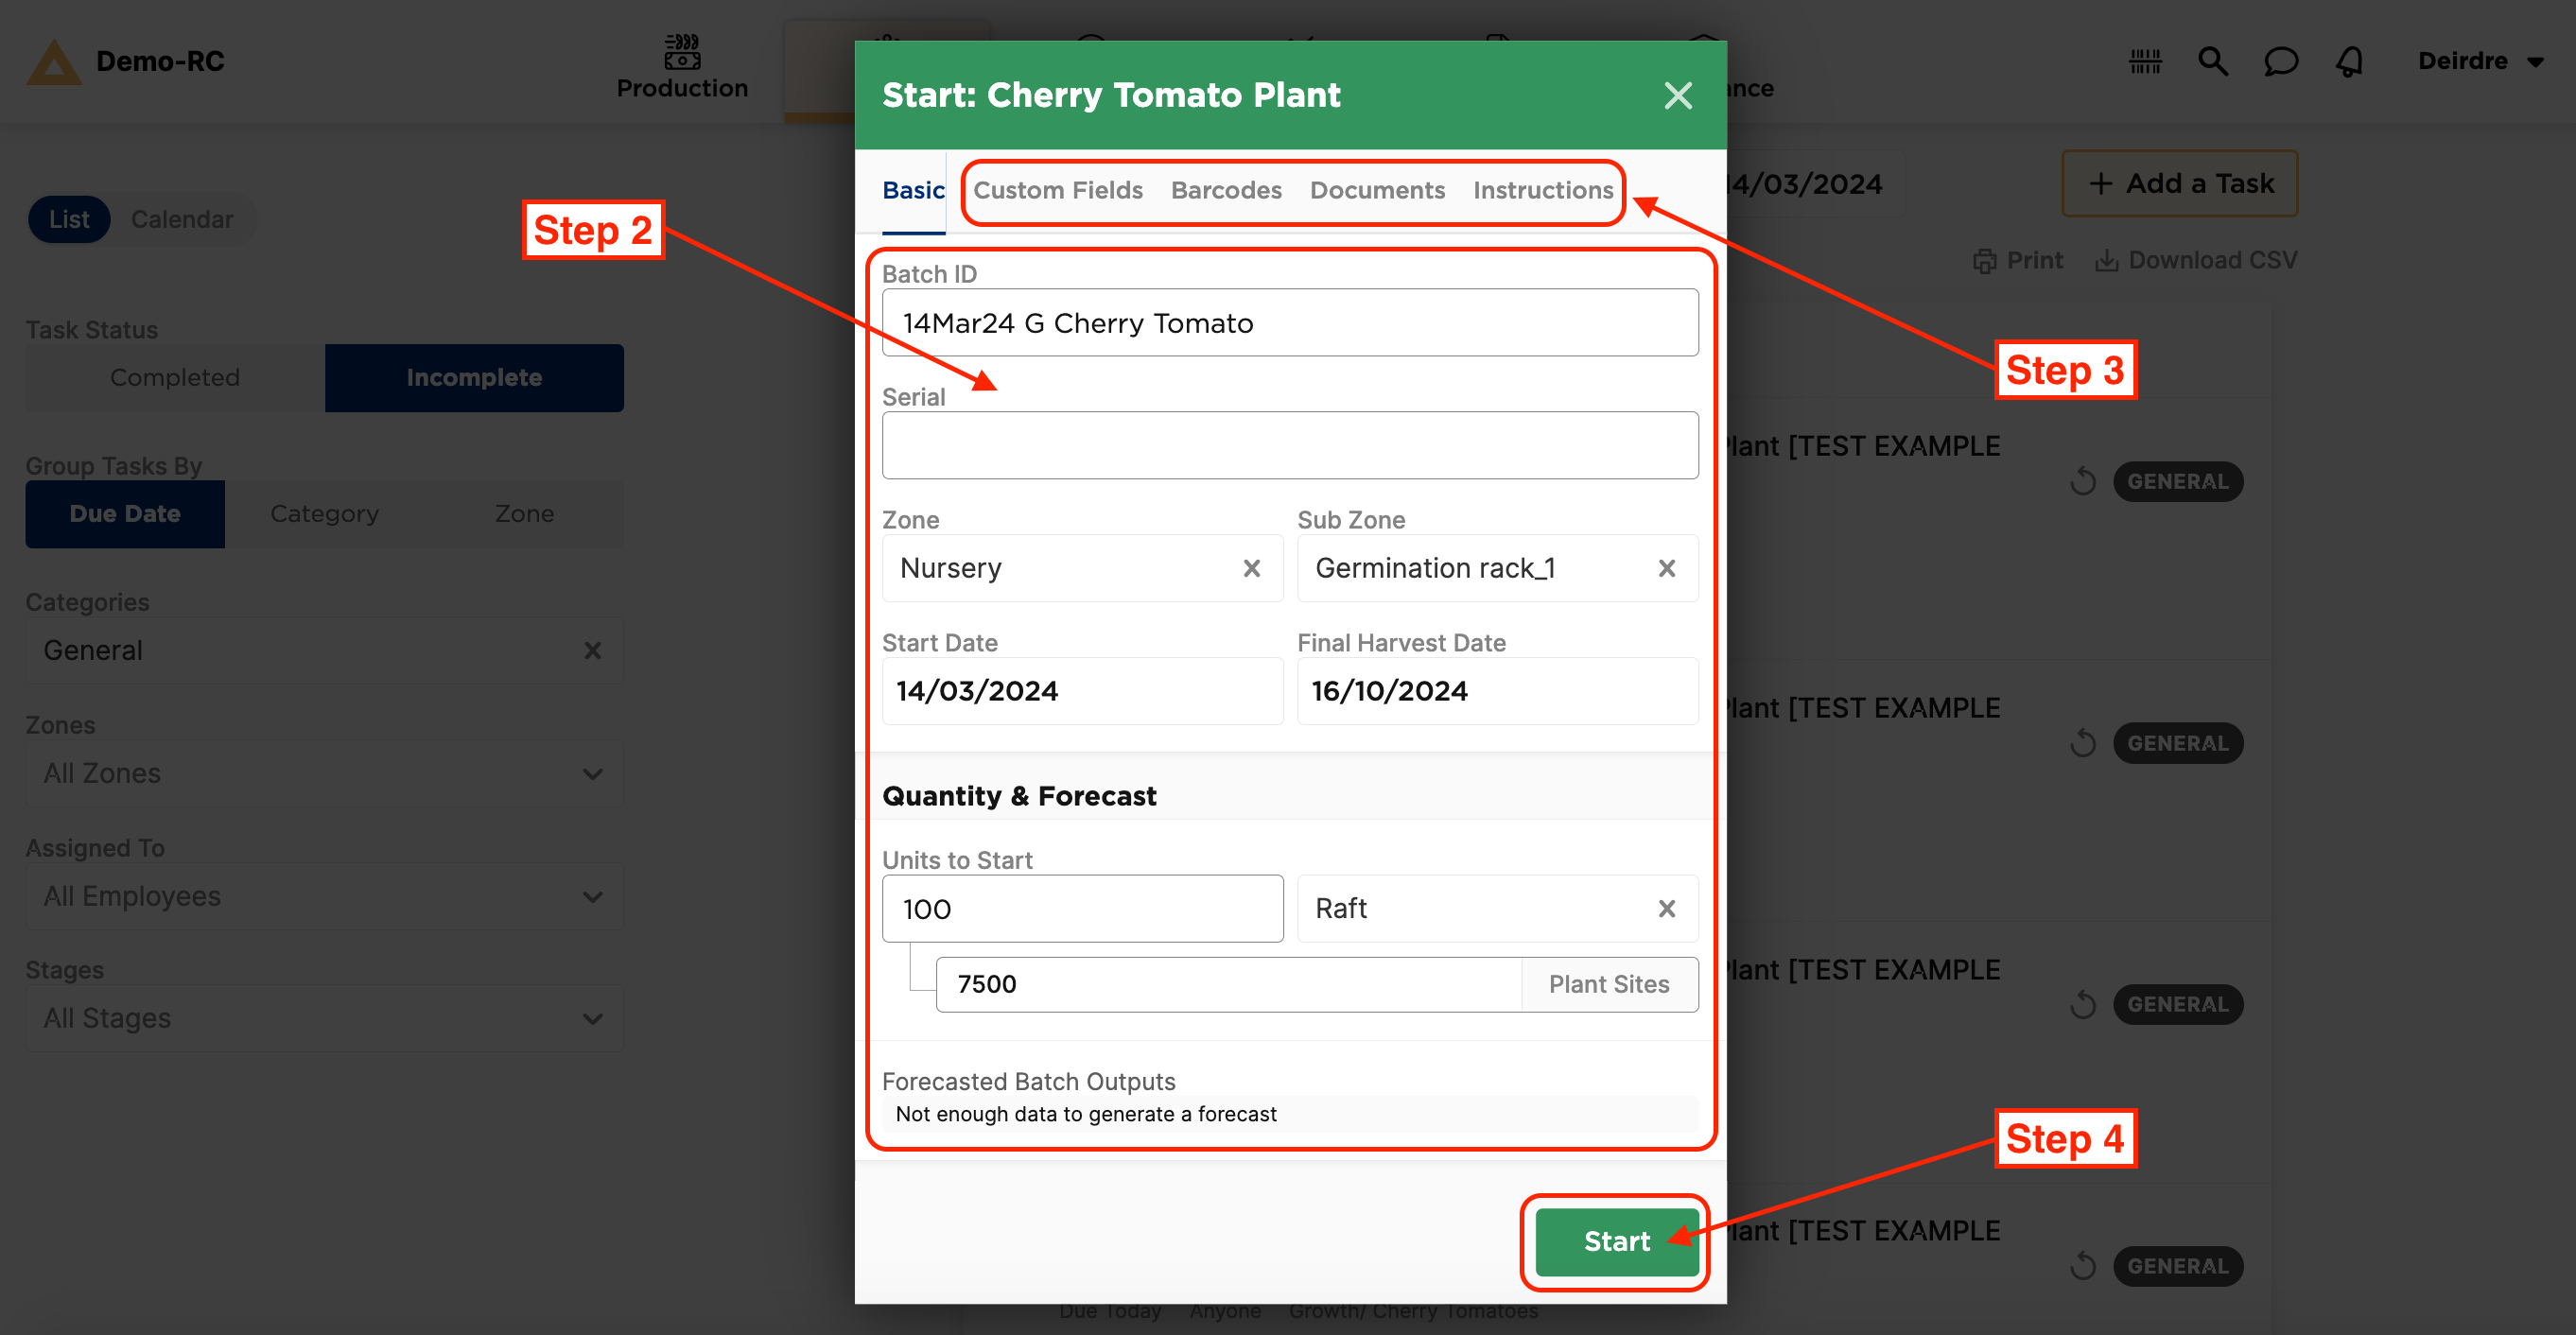
Step 2: In the dialog box, confirm/adjust/fill in the details about the batch you're starting.
Step 3: Refer to the tabs additional information, including checking any Instructions specific to the start task, filling out Custom Fields, setting Barcodes, and uploading Documents – if applicable.
Step 4: Click the green Start button when finished.
Starting one or multiples unplanned Batches from the Planning tab (aka unscheduled start)
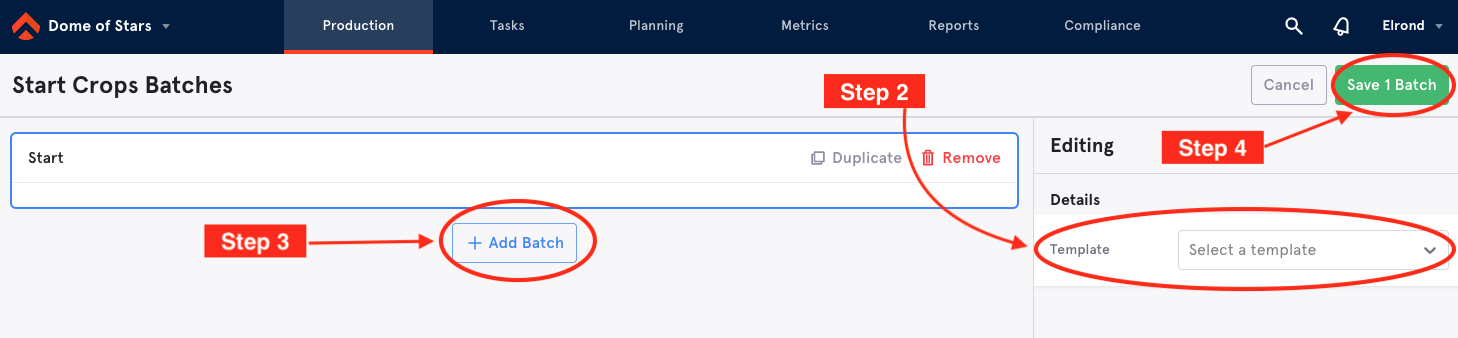
Step 1: On the Planning tab, find the Template you'd like to use to start a batch and click on the green + Start Batch button to its right.

Step 2: A new window will appear where you can add multiple batches on the left and edit the details of each batch in the dialog box on the right.
- In the dialog box, fill in the details about the batch, scrolling down to fill out all the fields and detail of the batch.
Step 3: On the left, use either the + Batch button at the bottom of the list, or the Duplicate button near the batch created
Step 4: Click the green Save (#) Batch button when finished on the top right corner
You can also start a batch ad hoc from the Production page.

Comments
0 comments
Please sign in to leave a comment.