The production tab shows a birds eye view of every batch of materials, plants, packages, or shipments in your facility. The production tab provides two different ways to view the same data – list view and timeline view. This article describes the functionality of the production timeline view. Timeline view displays each batches timeline in a Gantt Chart style. This enables you to easily view and adjust timelines for each batch.
Stages
Each stage of production, from material to cultivation to packing and shipping, are shown at the top of the page. You Customer Success Manager can customize these stages to match to your workflow. The stage that you are currently viewing is highlighted in blue. Listed below is every batch associated with the current stage you are viewing.
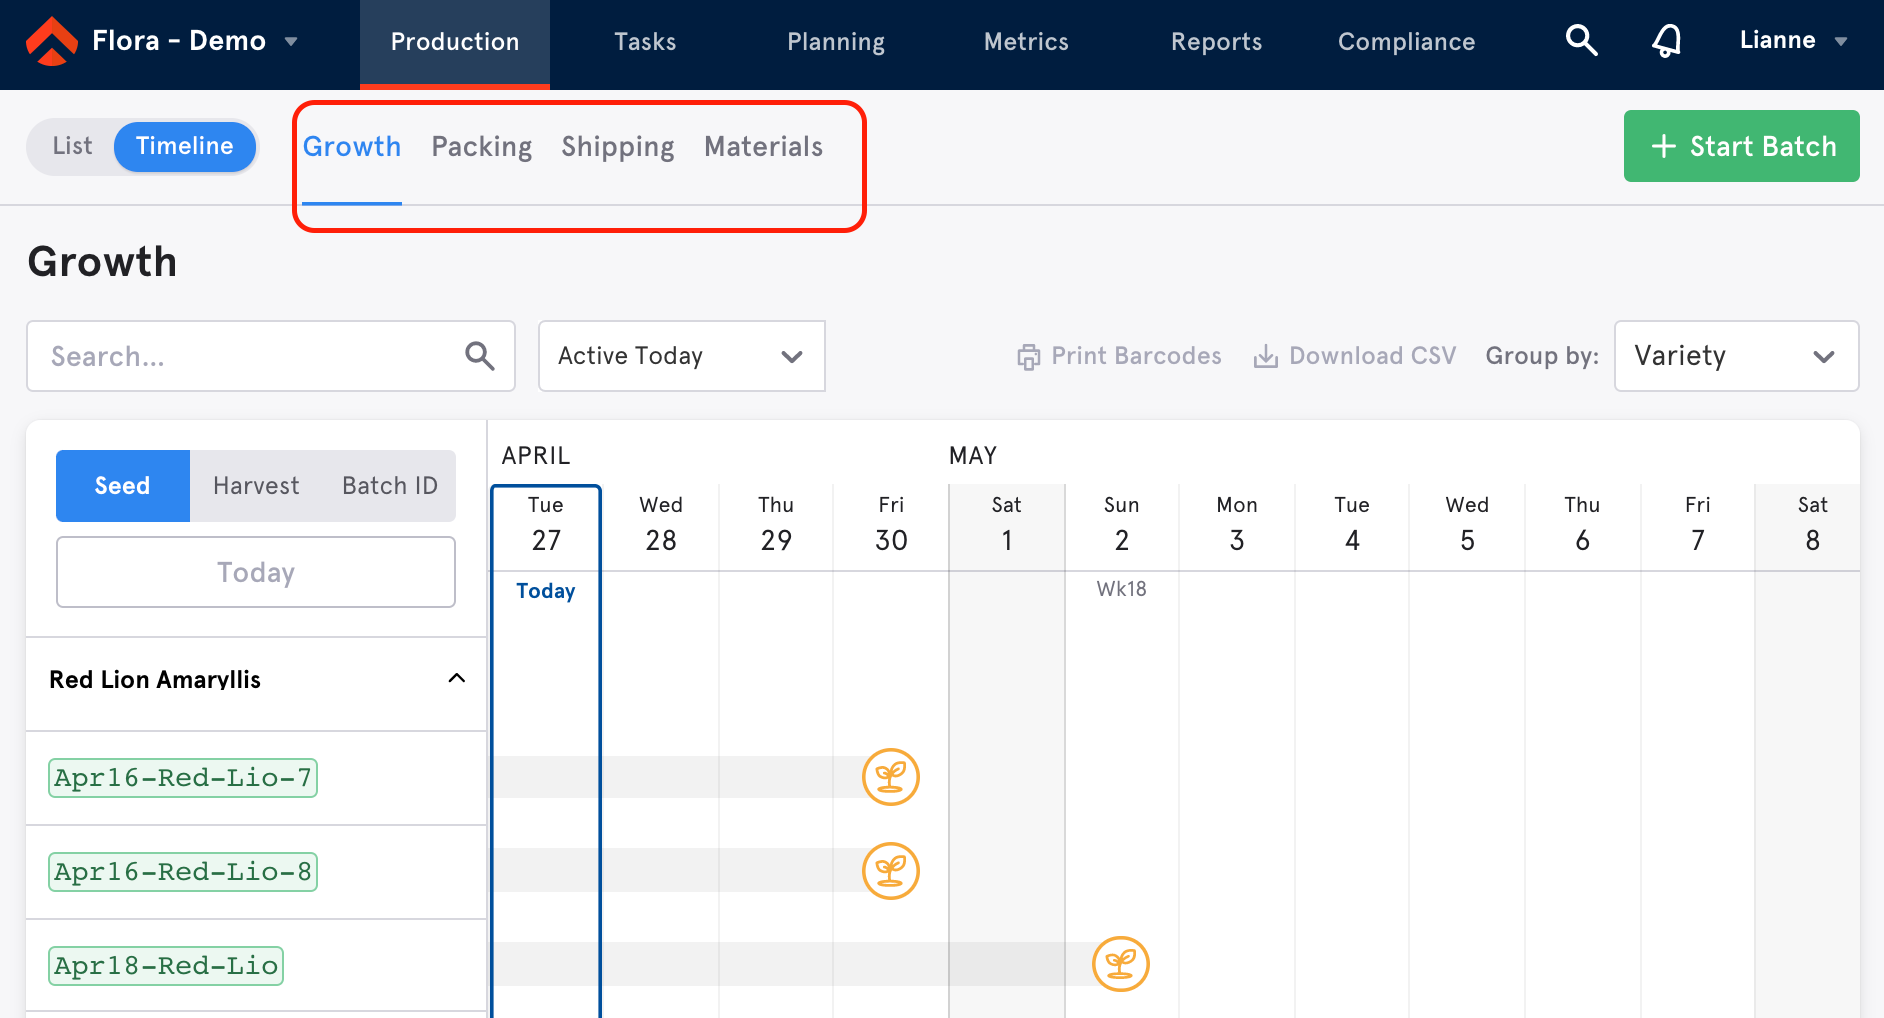
Batch ID
Each batch has a unique batch ID in green. For more detailed information about a batch, click the green batch ID to be taken its batch page.
Search and Sort Batches
When you're trying to find a batch, there are many different options you can use to track it down.
Find a batch by searching a barcode
Click the search icon in the main navigation menu to bring up the search box.
- If the batch has a barcode assigned to it, you can search by scanning a barcode or typing in a barcode number into this search box. You can also search a batch by name.

Find and sort batches on the Production tab
Step 1: Click Growth (or any stage) under the Production tab.
- You can select to view the batches in a Timeline view. This enables you to easily view and adjust timelines for each batch.
Step 2: Use the Growth search box and filters to find the batch.
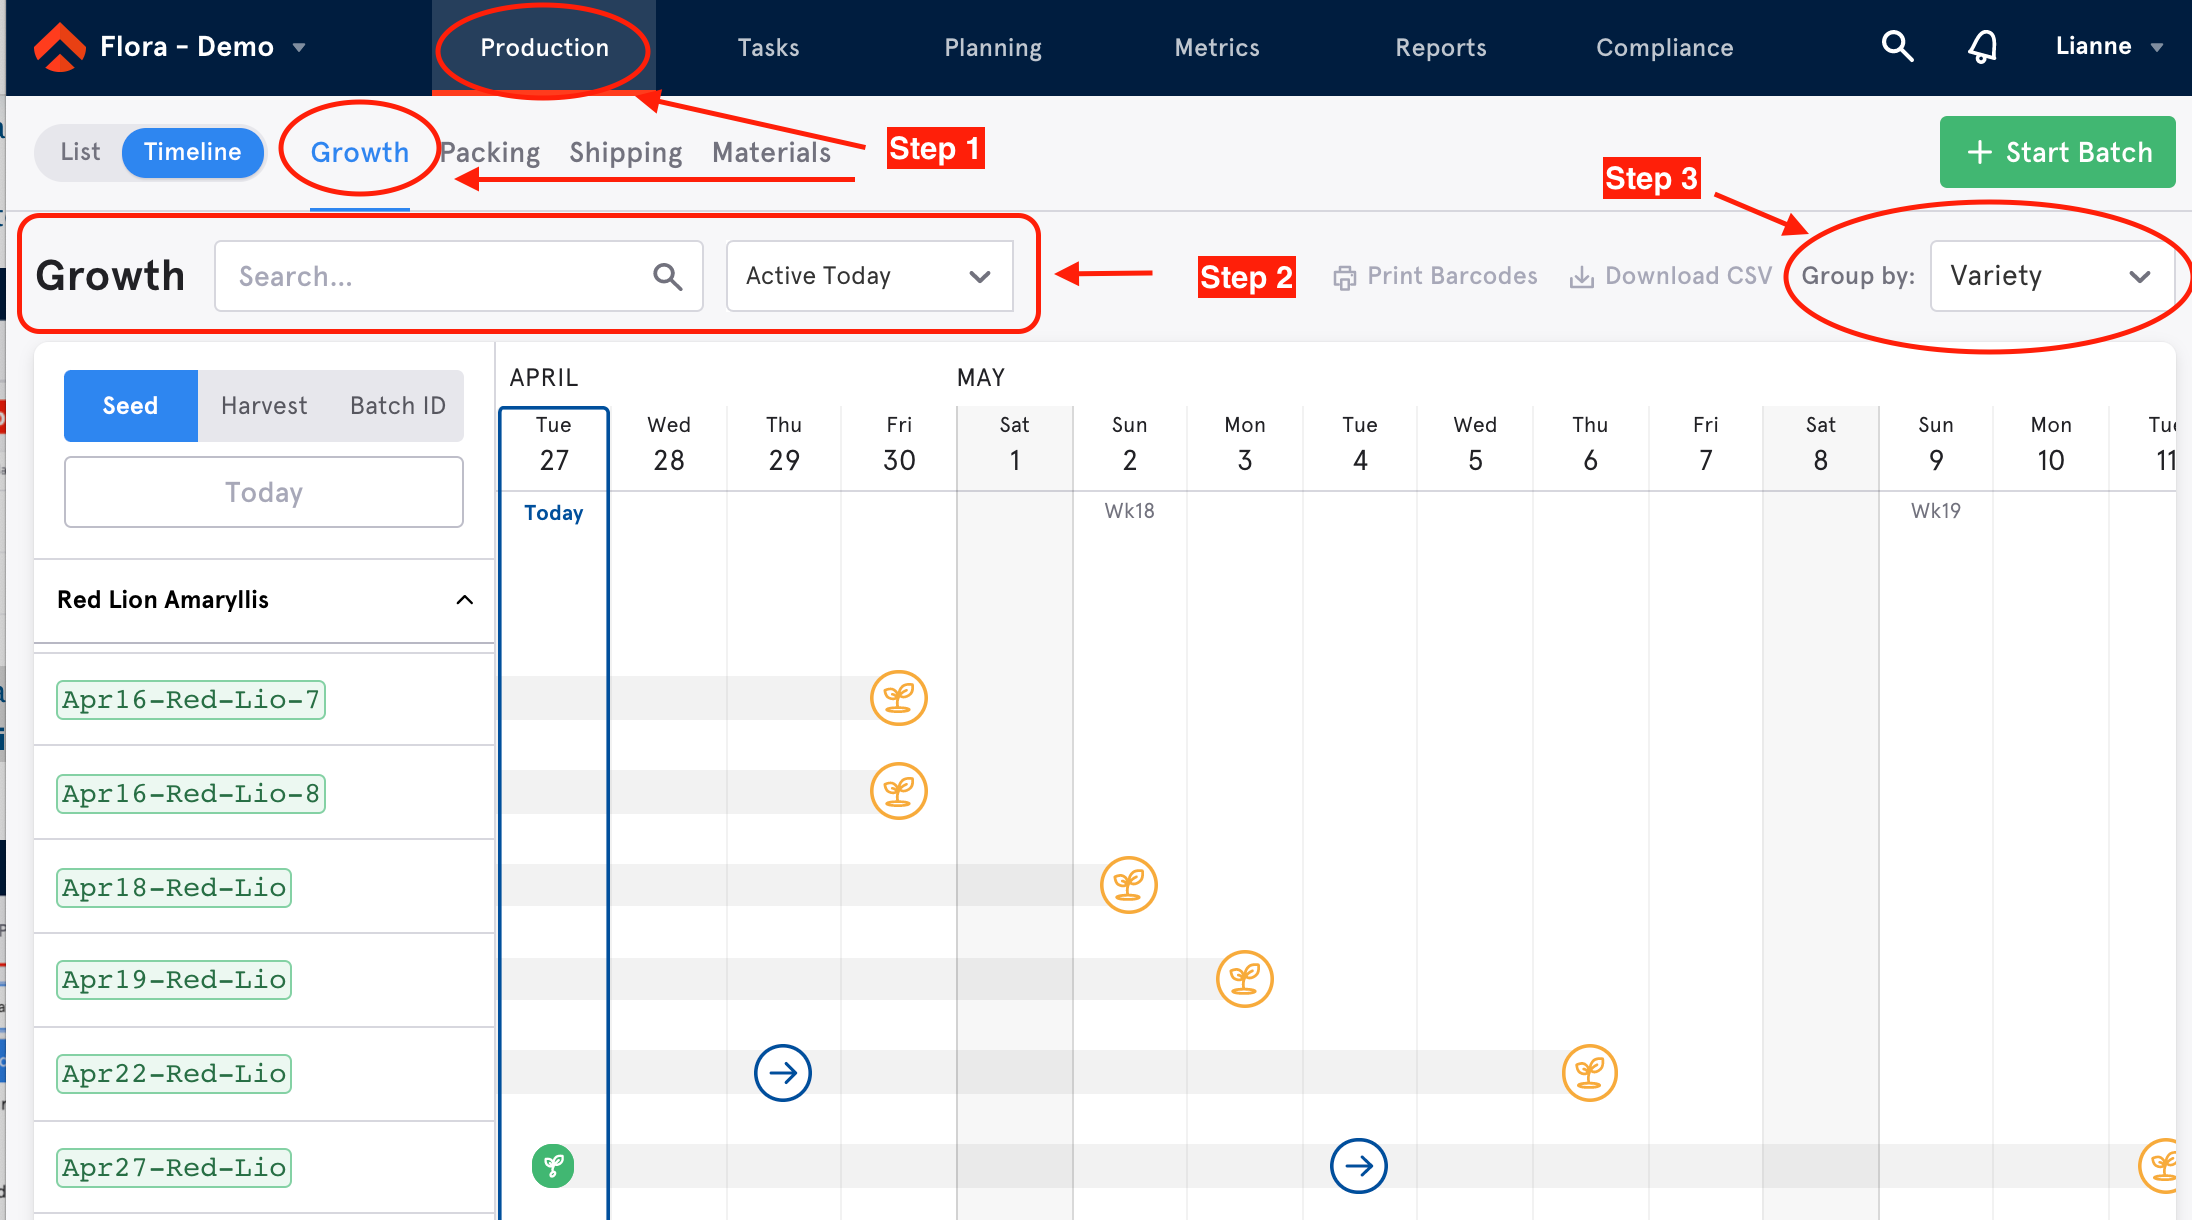
You can search by crop variety or identifier (name). You can also limit your search to Active Today, Active During, Seeding, Harvested/Finished, Planned Harvest/Finish, Completed and Available Inventory.
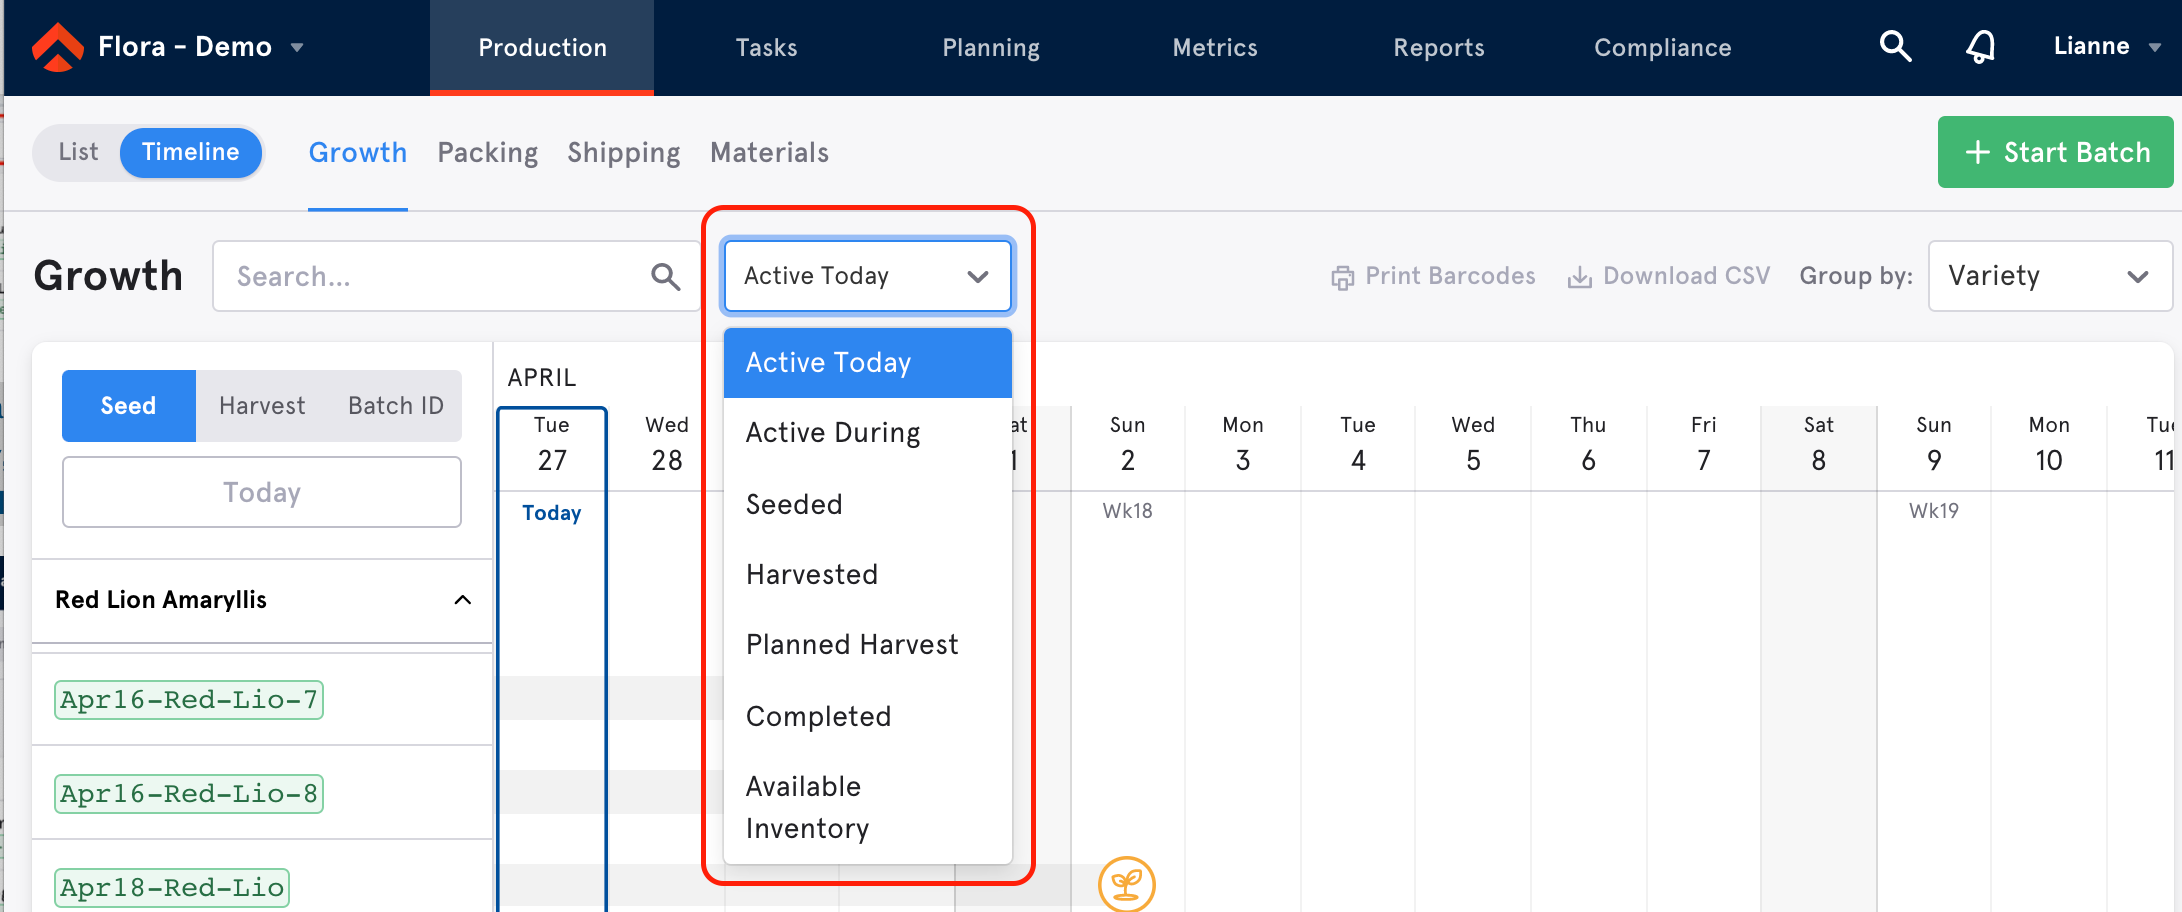
- Active Today: All batches that are active today, including Finished and Destroyed if they were active today.
- Active During: All batches that were active during this window of time, including Finished and Destroyed.
- Seeded: All batches that have a start date inside this window of time.
- Harvested: All completed/finished batches with a complete finish date inside this window of time. It does not currently include active batches with a partial finish/harvest.
- Planned Harvest: All batches with an uncompleted planned harvest date in this window of time. Currently, past completed planned harvest dates are not saved, so no past data will show up if the harvests are completed. Planned harvest dates for old batches only show up if their harvests were not completed.
- Completed: All batches with their complete finish (harvest) or complete destroy date in this window of time.
- Available Inventory: This is best used on a material, packing, or shipping stage. It shows all active batches with inventory that is available to be drawn down from, regardless of when it was ordered.
Step 3: If you want to sort the batches by variety, zone, or any custom field, click the dropdown menu Group by.
Group by Variety
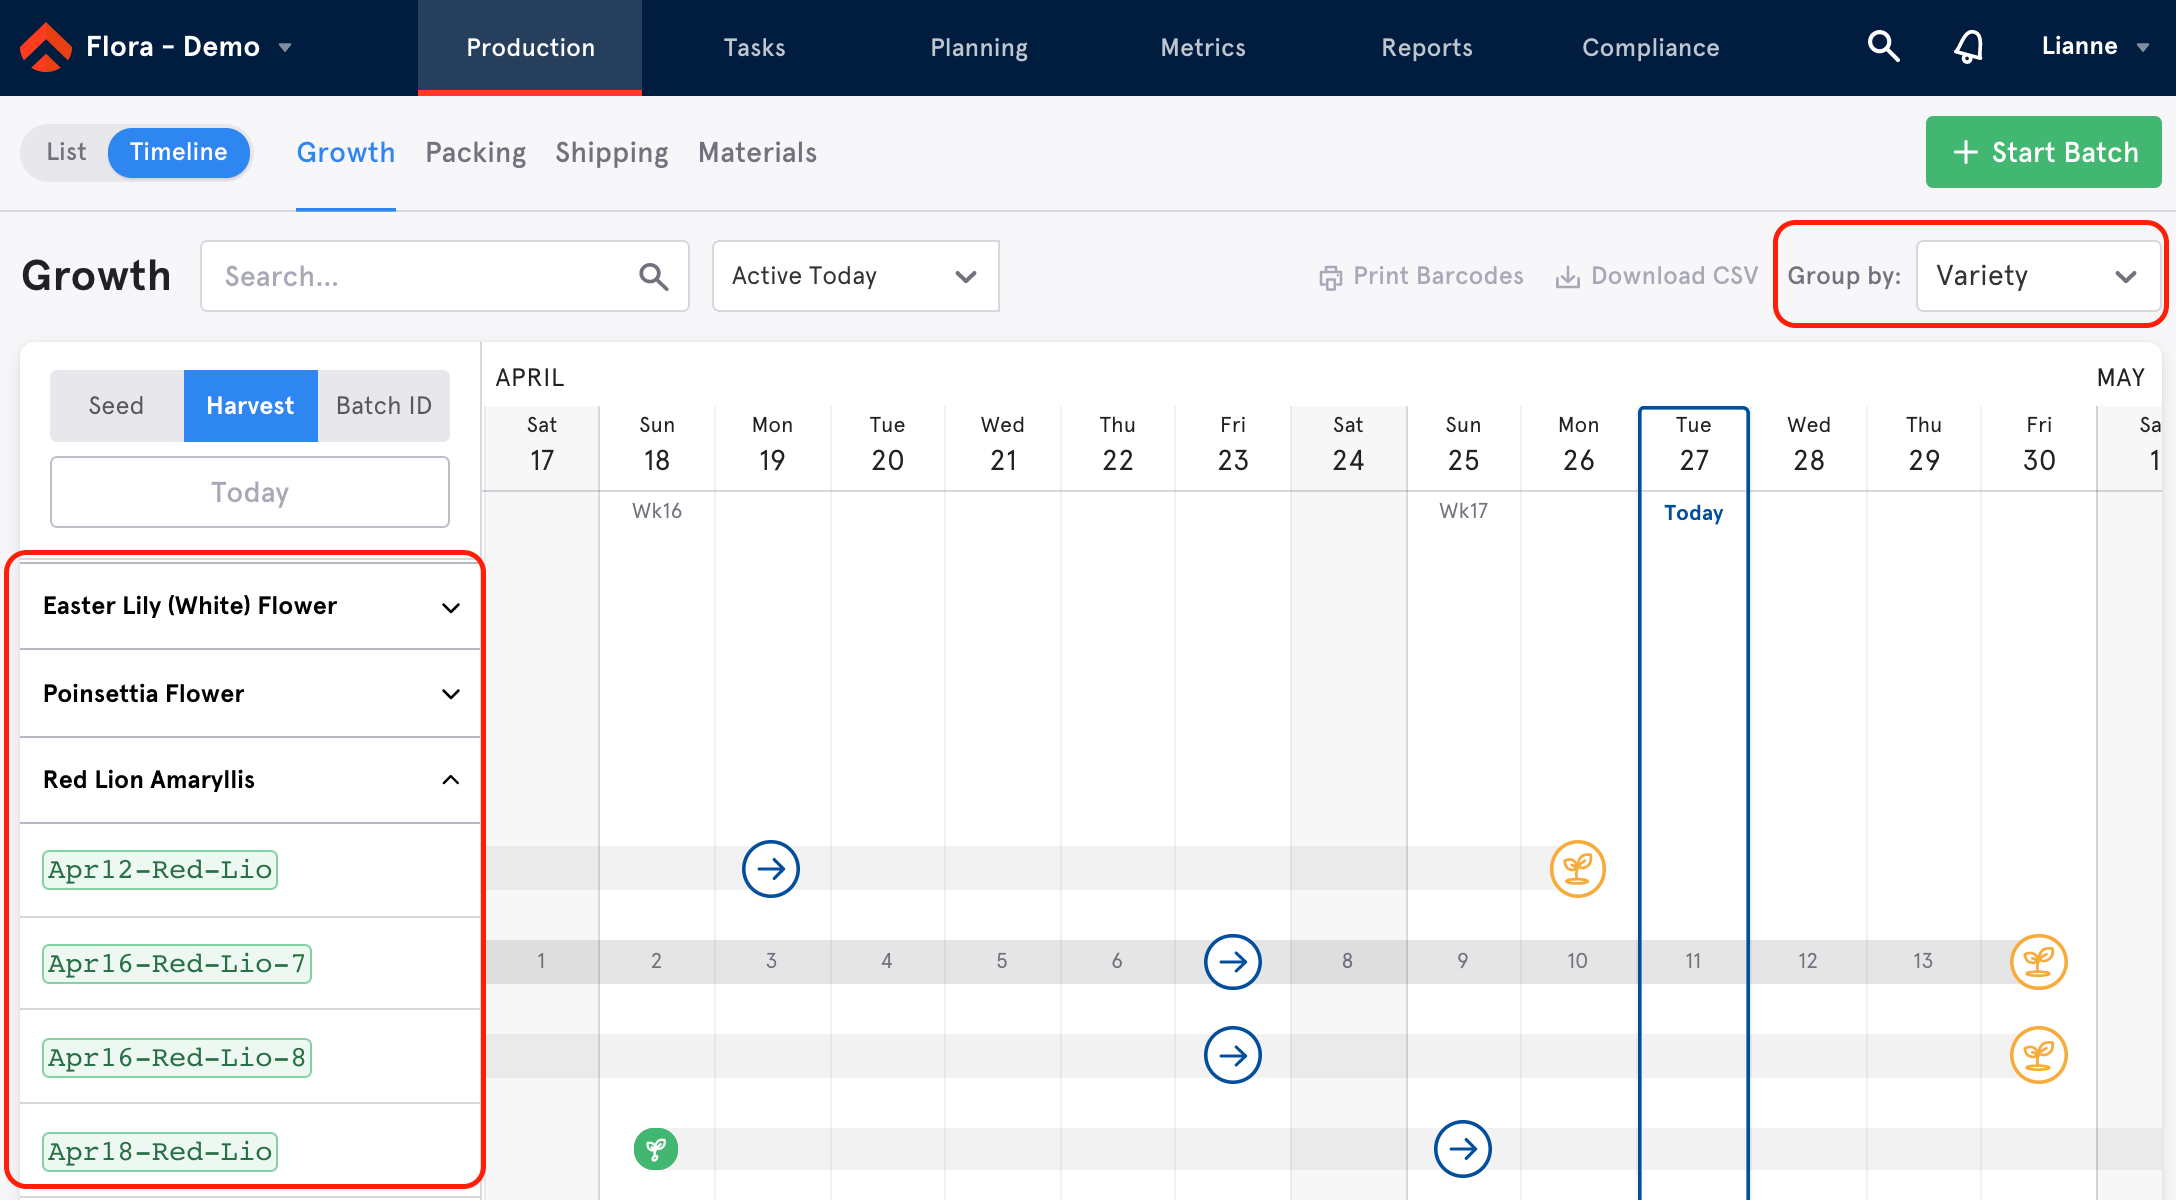
When you Group By variety, each variety will have it's own heading under which all the batches of that variety will be listed. The headings can be collapsed or expanded.
Viewing and Adjusting the Timeline
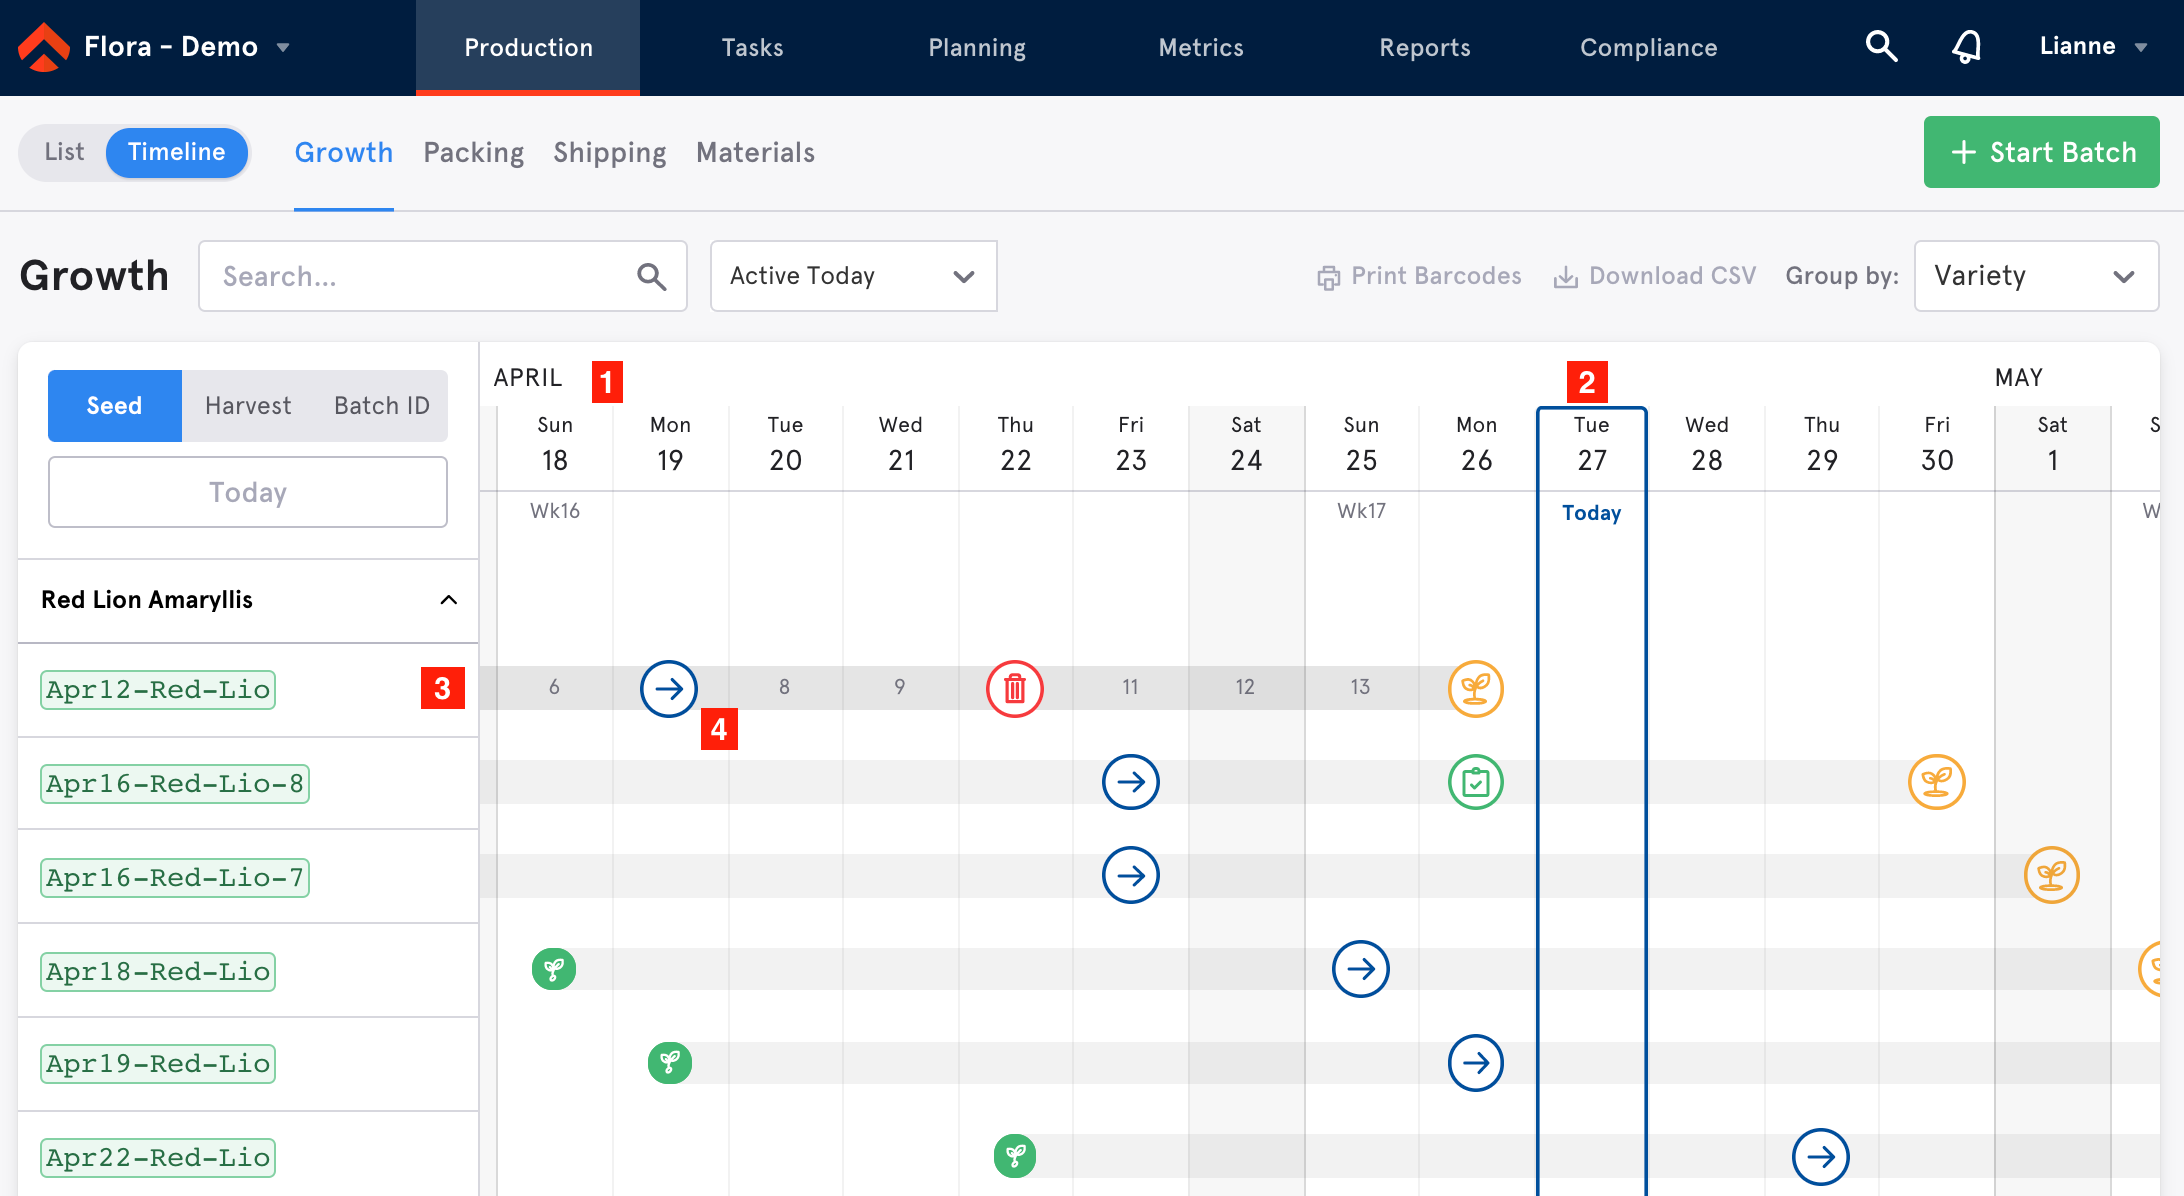
1. The timeline view header lists the month, day of the week, the date, and the week number of the calendar year.
2. Today's date is encircled in blue.
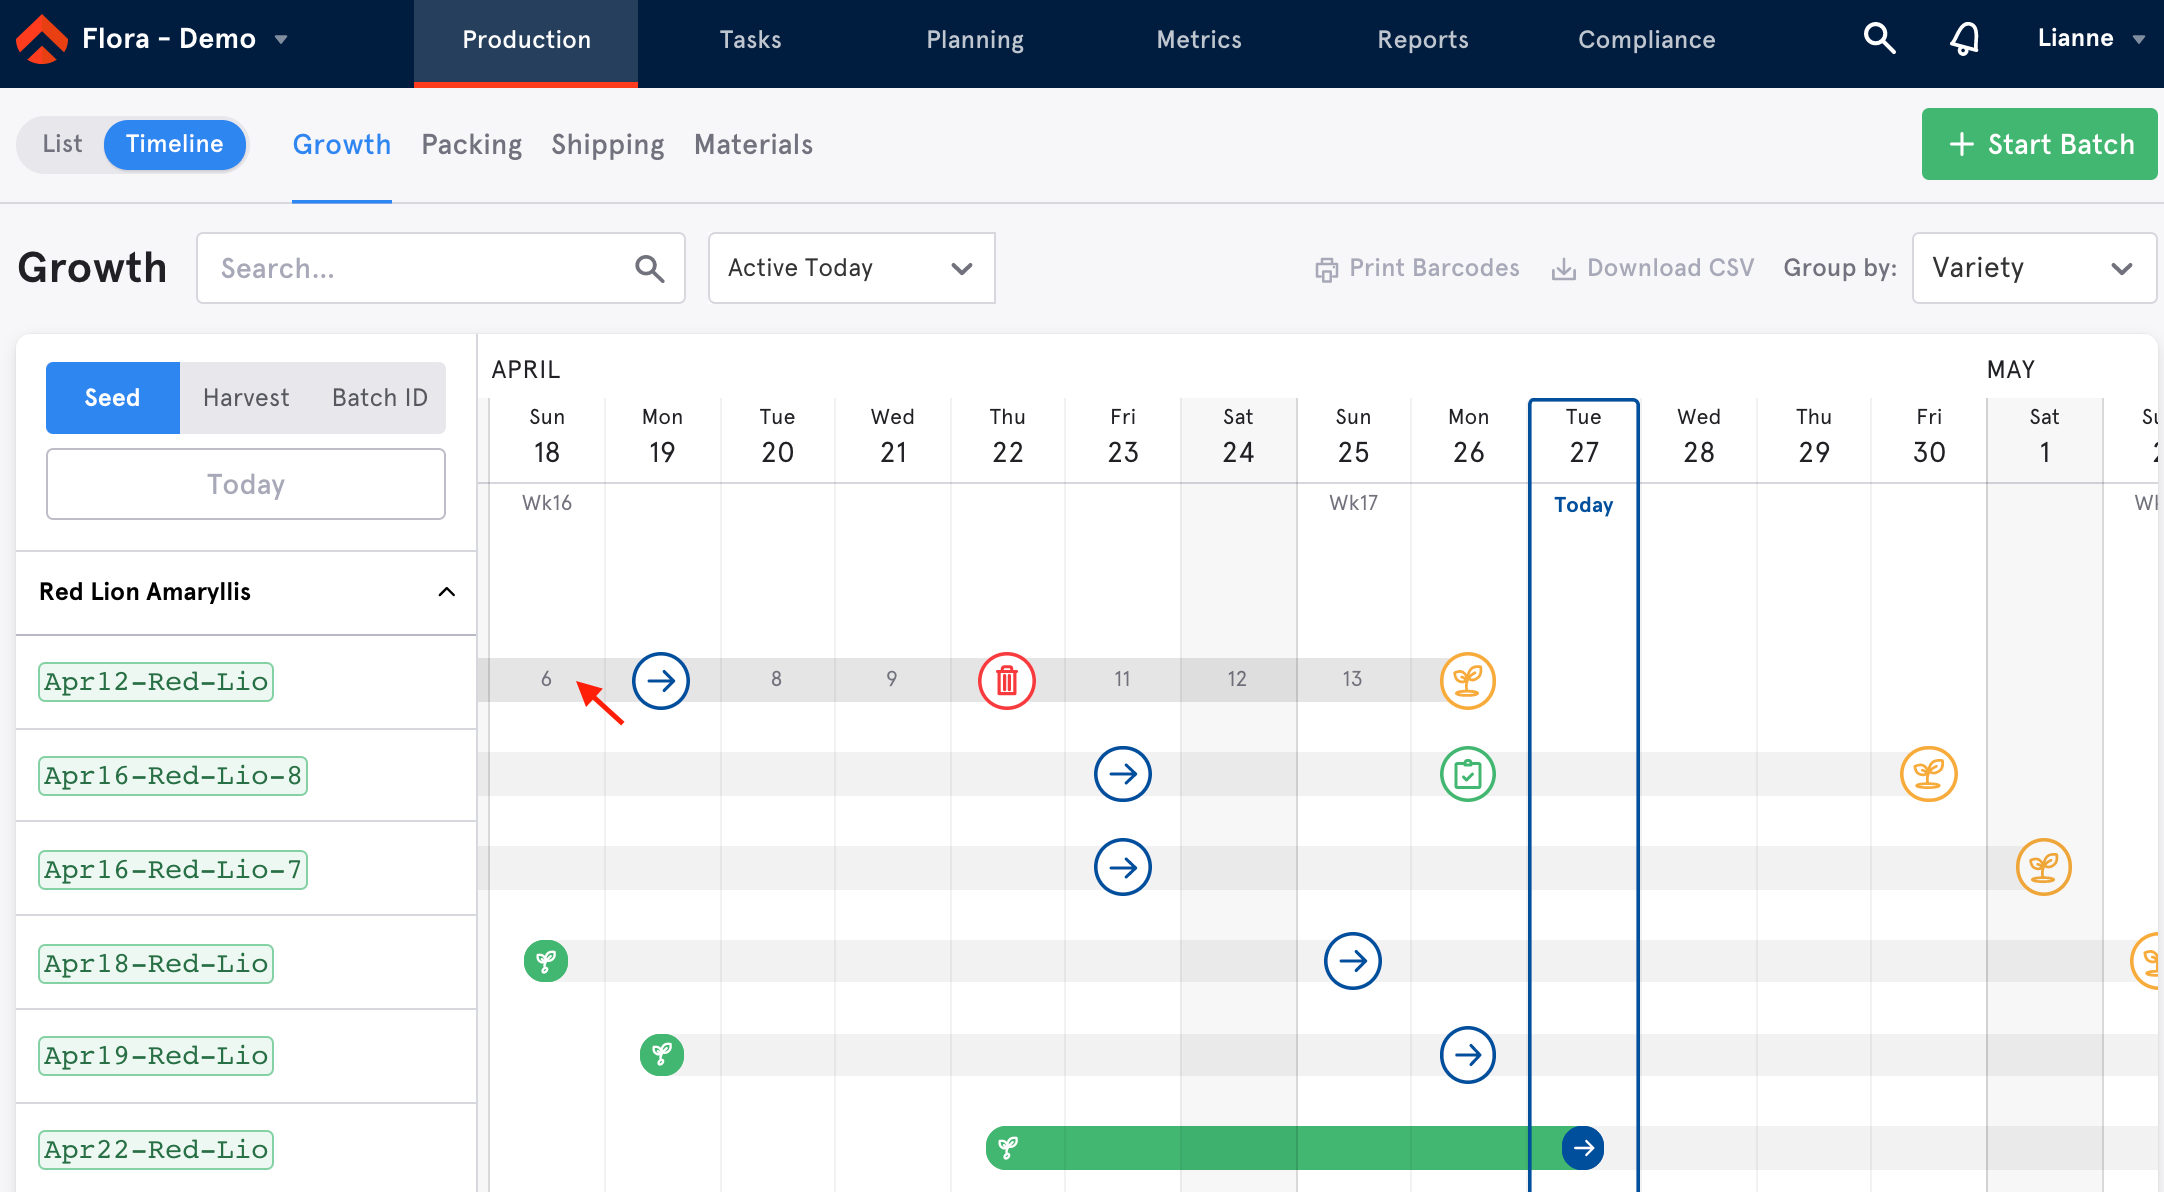
3. Below the header is each batch ID, and the timeline of that batch. If you hover over a batches grey timeline, it will display a number showing the batch age on a give day. For example, batch Apr12-Red-Lio is 6 days old on Sunday, April 18th, the 16th calendar week.
4. Every task in a batch's timeline is represented by a symbol within a bubble. Incomplete tasks are not colored in, while complete tasks are colored in along with their timeline prior to the latest complete task.
- Start tasks: green sprout
- Move tasks: blue arrow
- Destroy tasks: red trash can
- Manual task: green clipboard
- Harvest tasks: yellow sprout
Every task is displayed on the day it is due. For example, batch Apr12-Red-Lio had a move task due on Monday April 19th.
Viewing, Editing, and Completing Tasks
To view a task summary, hover the mouse over the task bubble. To complete a task, click the open check box.
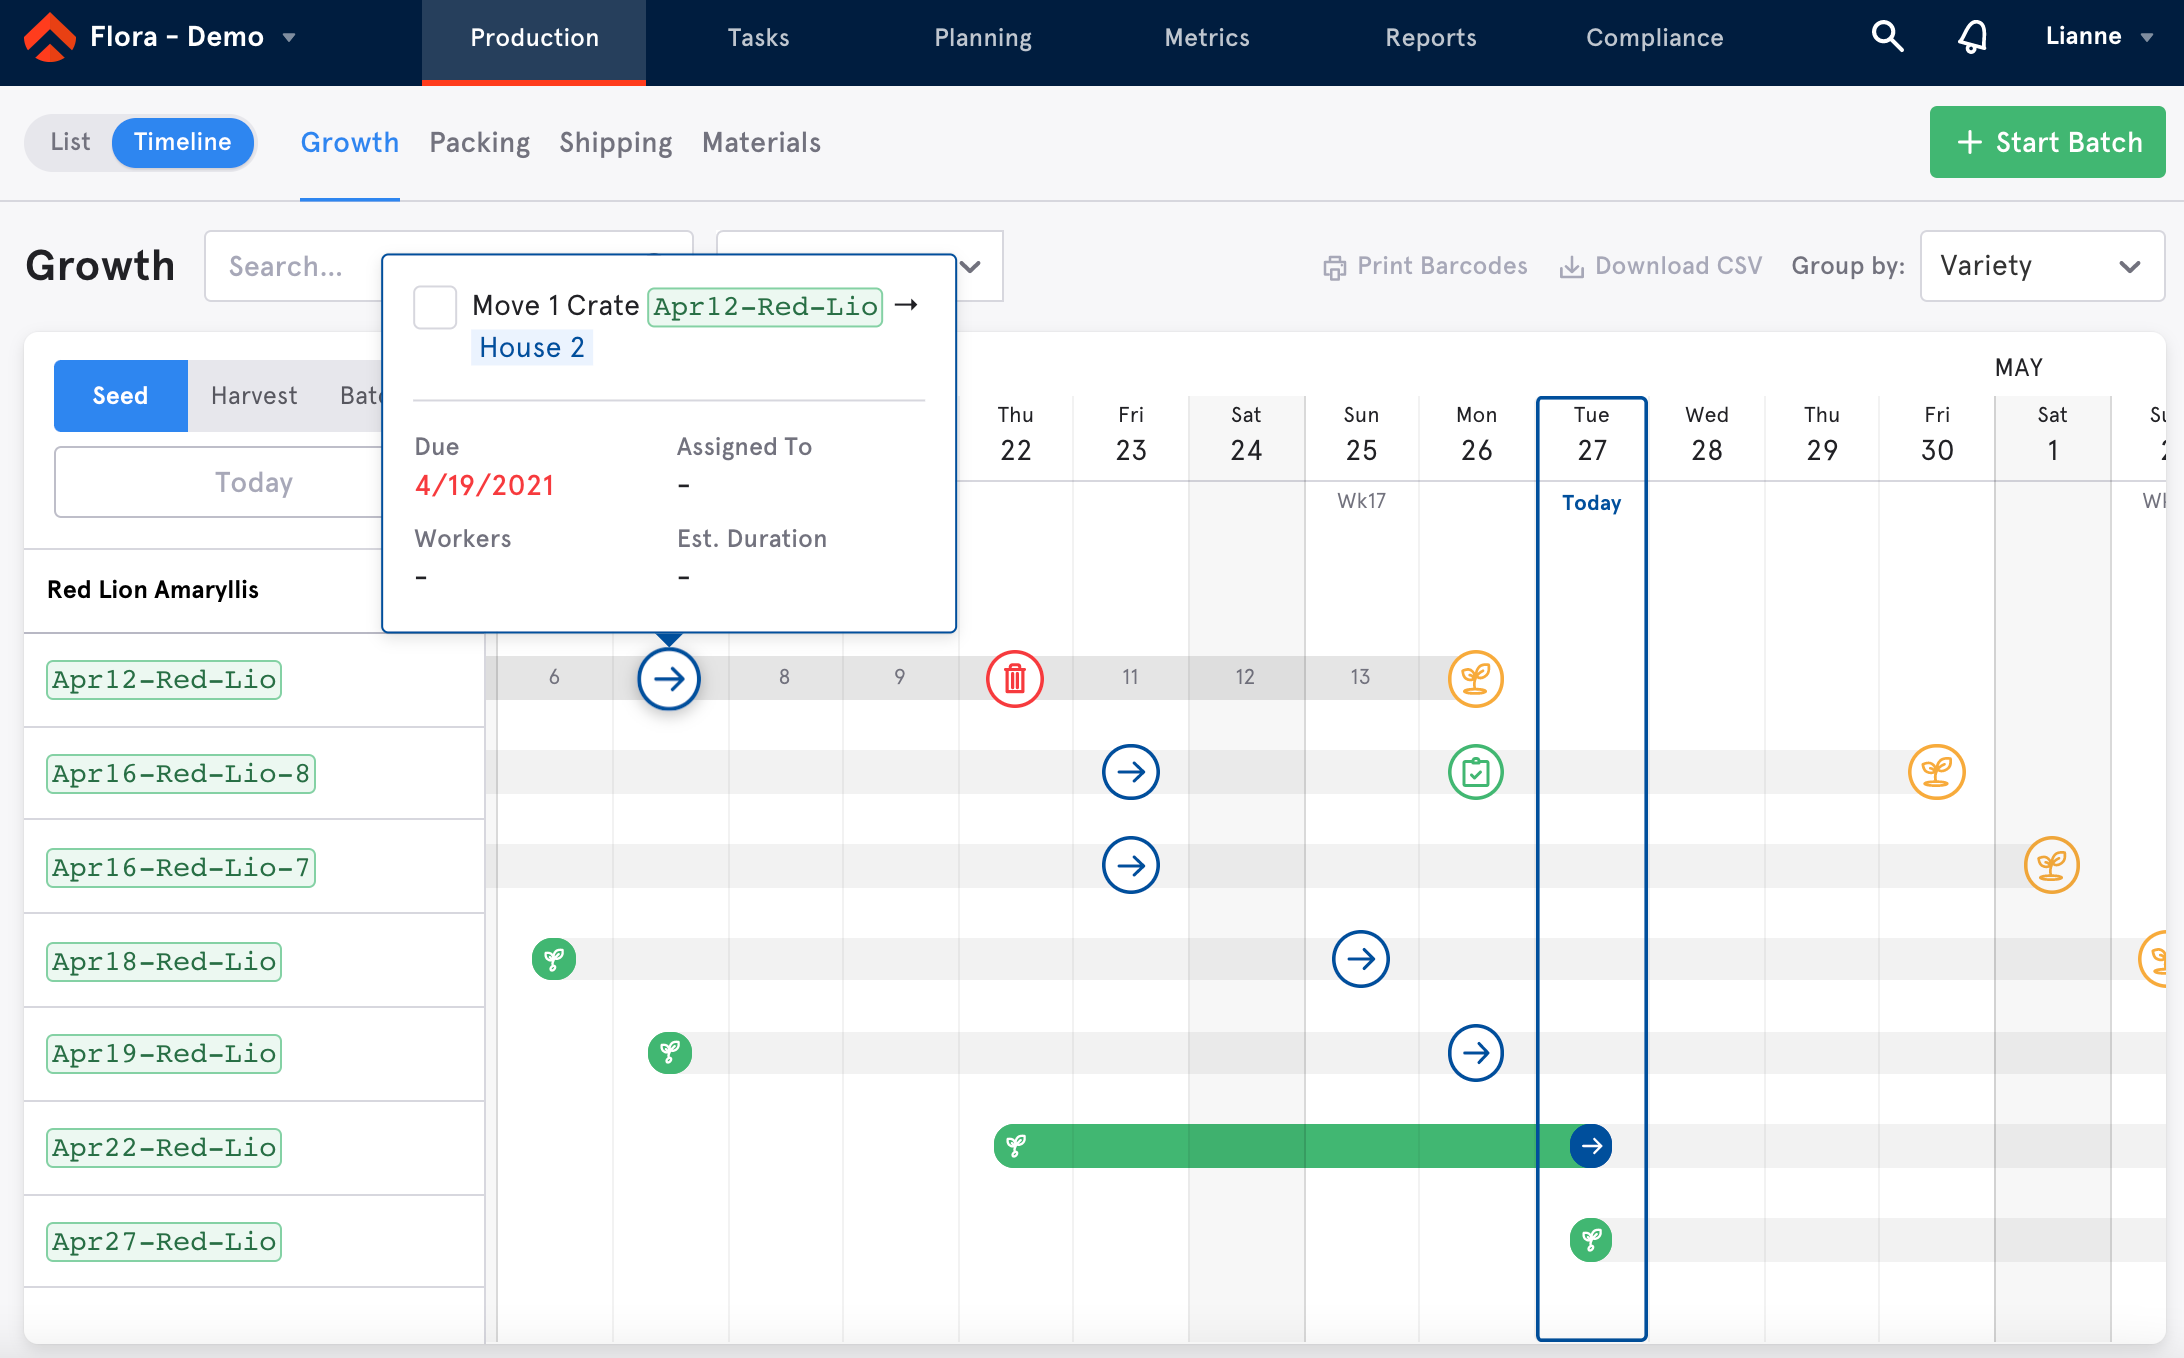
To edit a task, click on the task icon to open the task edit modal, make your adjustments, and click save.
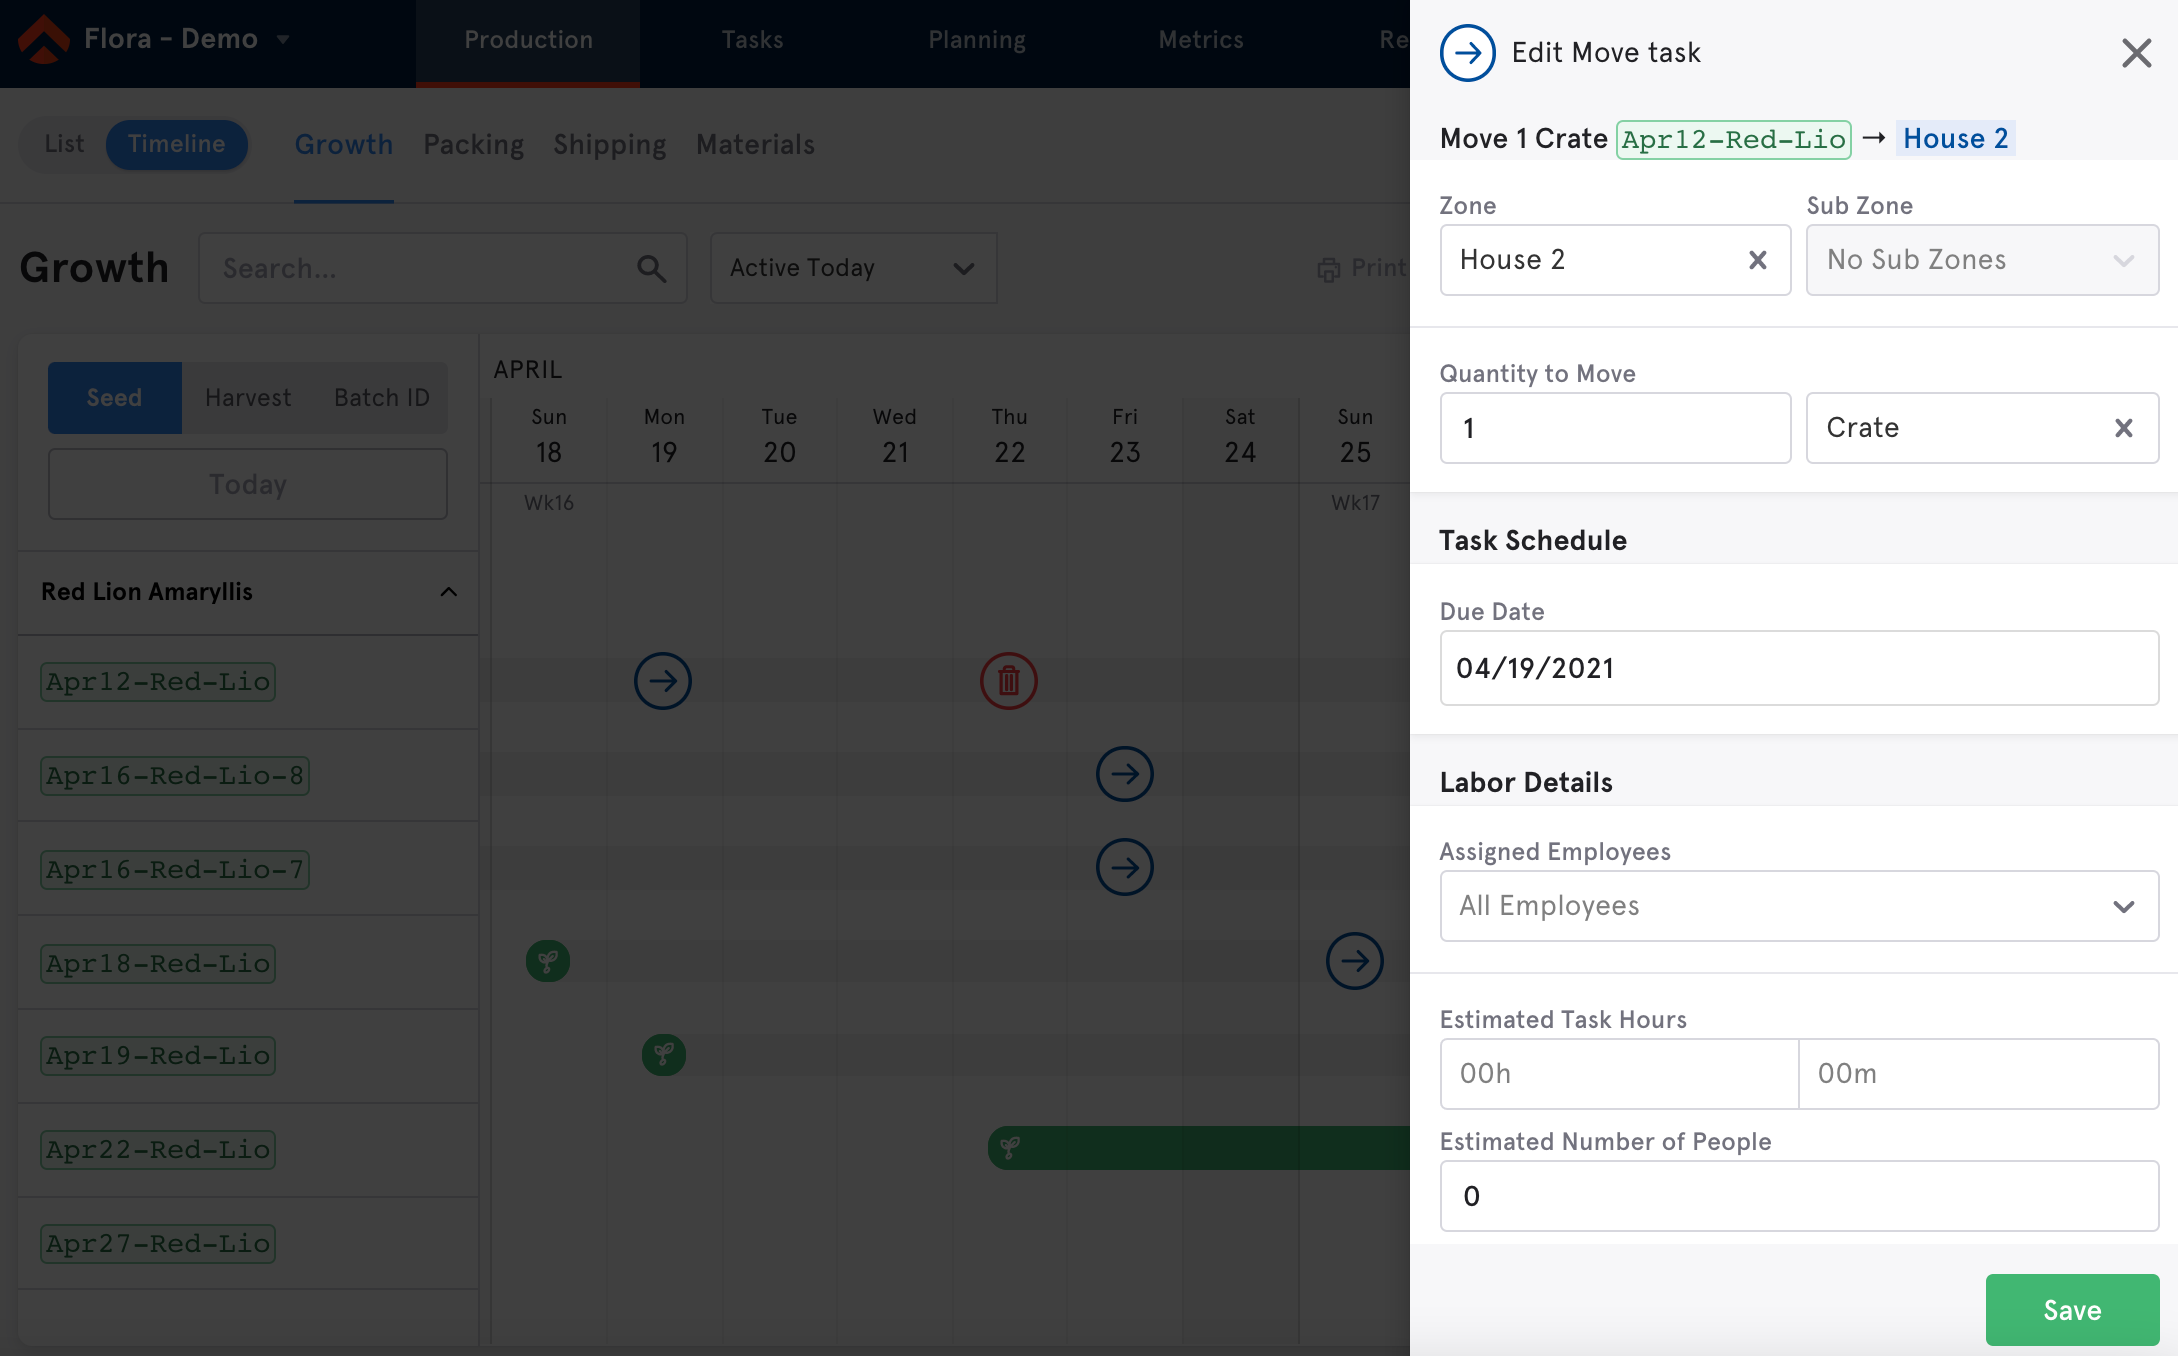
Adjusting due date of one task
If you want to adjust the date that a task is due, simply click the task icon and drag it to the new date. This will automatically update the new due date for that task across the entire system, no need to go to the task list or batch page to adjust to the new due date. Dragging the task icon will only change the due date of that individual task.
Adjusting entire timeline
If you want to adjust an entire timeline, simply click on the grey timeline of that individual batch, and drag the entire timeline out however many days you want to adjust it. In this example, if you want to move, destroy, and harvest tasks out two days for Apr12-Red-Lio, click on the grey timeline before the move task. If you only want to move the destroy and harvest task, click on the grey timeline after the move task.
Print Barcodes
See “Printing Barcodes” for more details.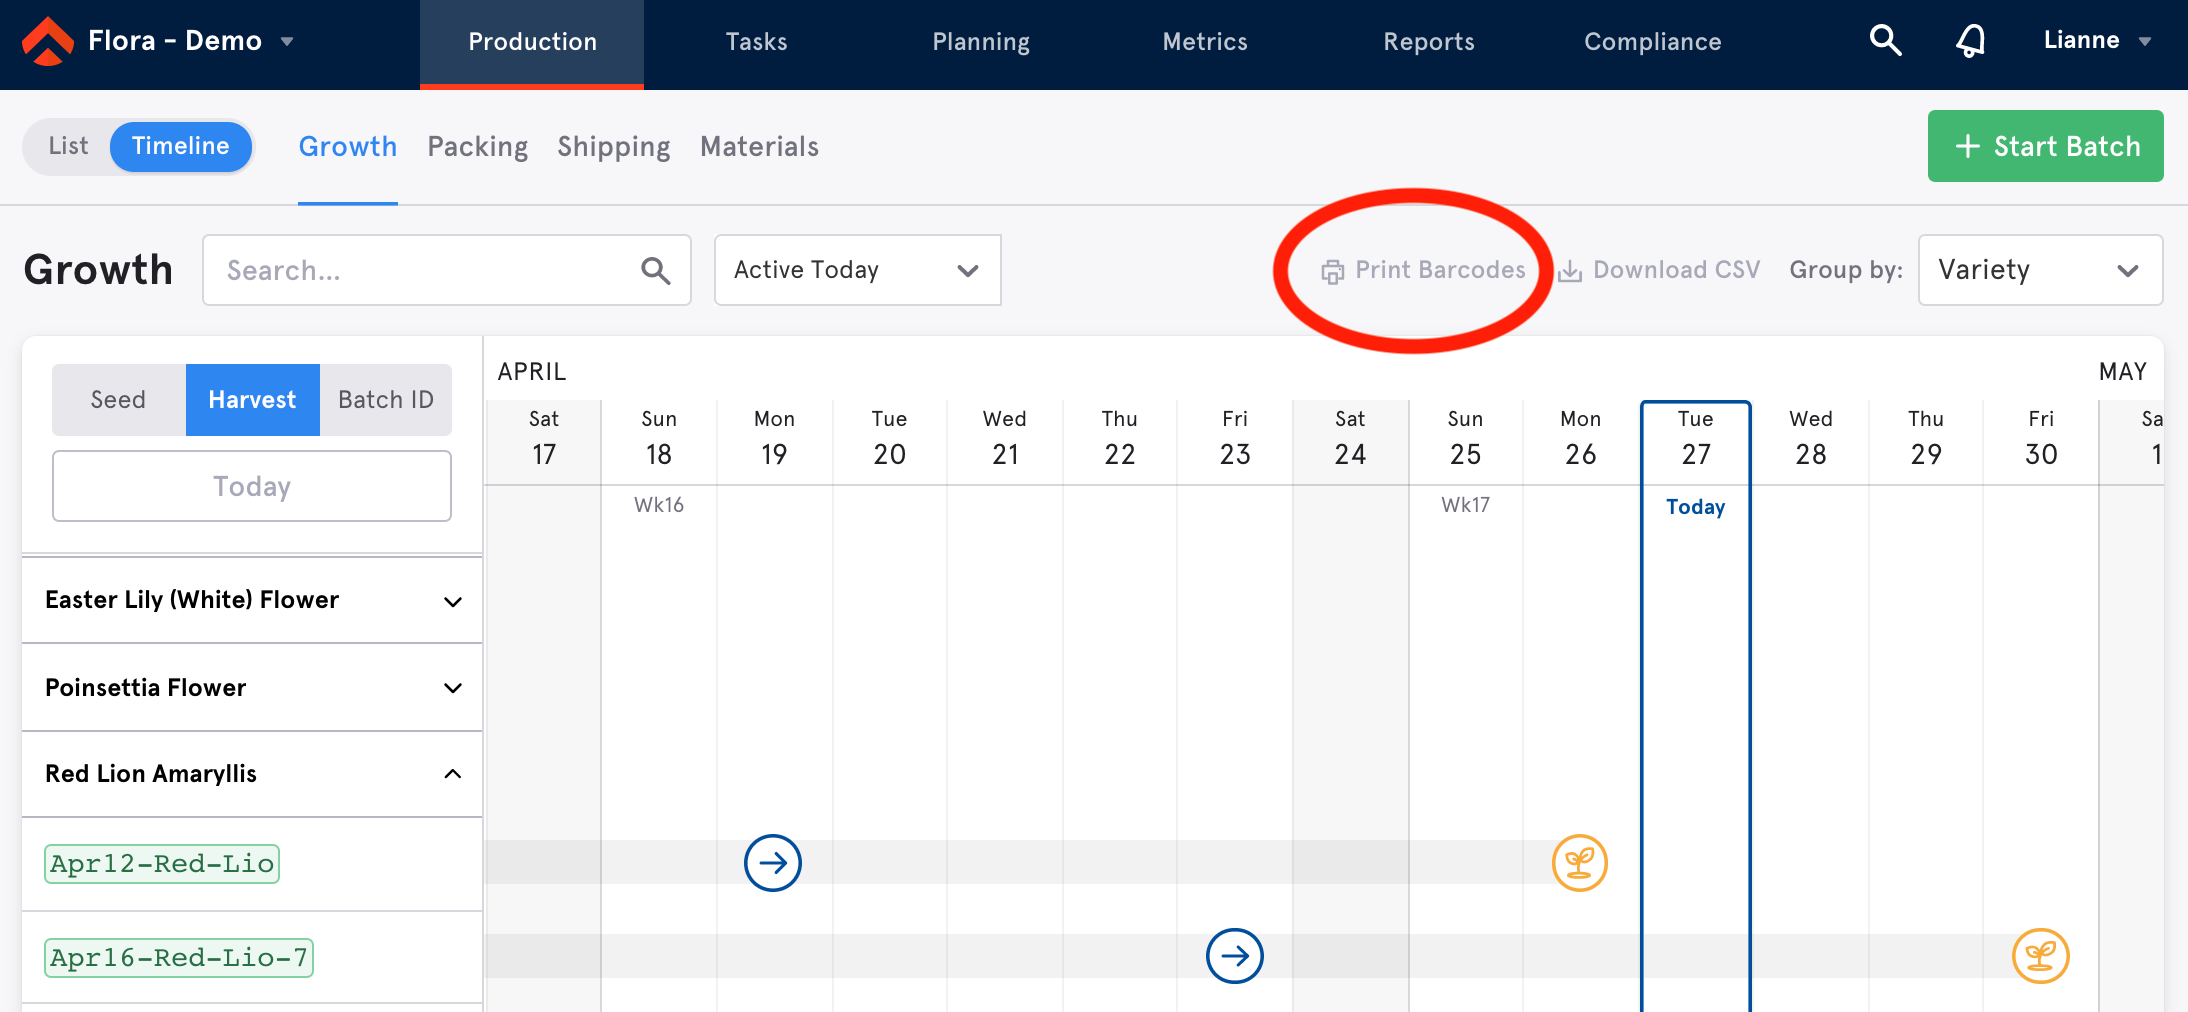
Download CSV
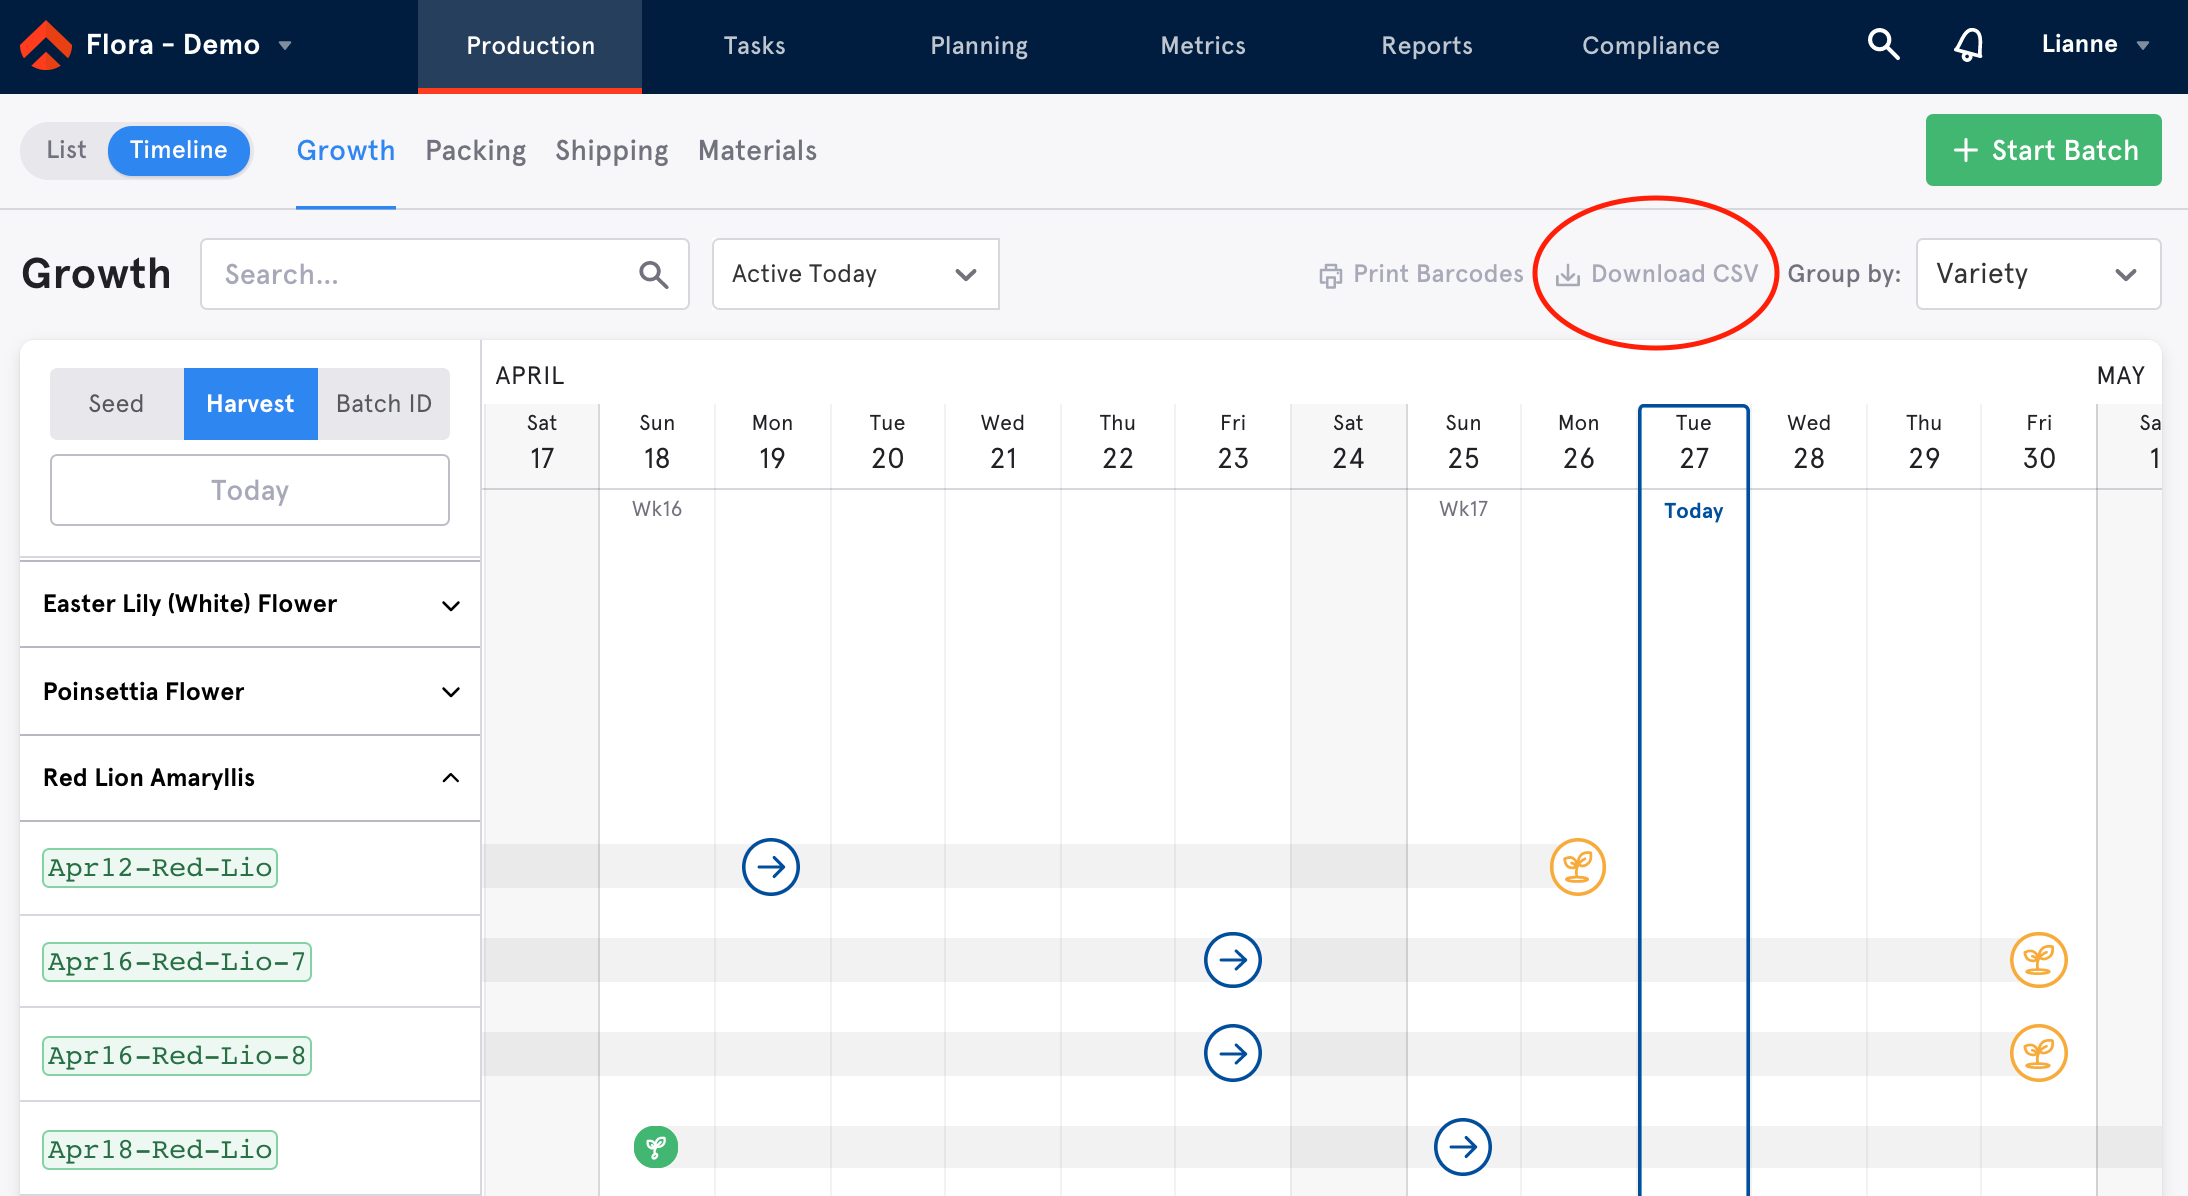
Click ‘download CSV’ to export the data shown on the production page into a CSV in order to easily share your data with people who do not have access to your LUNA CMP account (e.g. auditors). Only the data shown in this stage (in this example, the vegetative stage) will be exported. If you’ve filtered your production list view, only the batches you see on this page will be exported.

Comments
0 comments
Please sign in to leave a comment.